Setting up a Development Environment
The Embedded 101 workshop will utilize the Microchip suite of microcontrollers and development tools.
![]()
The development tools will allow us to write software to target PIC microcontrollers, compile the written software to an executable binary, and download/flash the binary to the target microcontroller chip.
As such, now is a good time to locate, download, and install the Microchip XC compilers, and Microchip MPLABx Integrated Development Environment for your computer. Aside from your already spent capital cost of equipment and internet connection, this step requires $0, and will enable you to get started exploring in the realm of software development.
The Microchip XC compilers may be found at http://www.microchip.com/mplab/compilers
Scroll down towards the middle of the page, click on the “Downloads” tab, and locate the XC8, XC16, and XC32 compilers for Windows, Linux, or Mac.
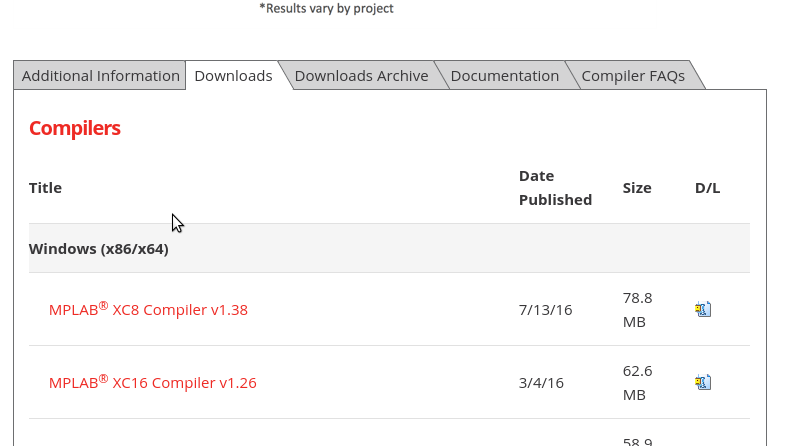
While the plan of the Embedded 101 workshop is to focus on the PIC24 series microcontrollers, which uses XC16, installing XC8 and XC32 alongside XC16 will provide a development environment to support the full range of Microchip CPUs. Go ahead and download all XC* compilers.
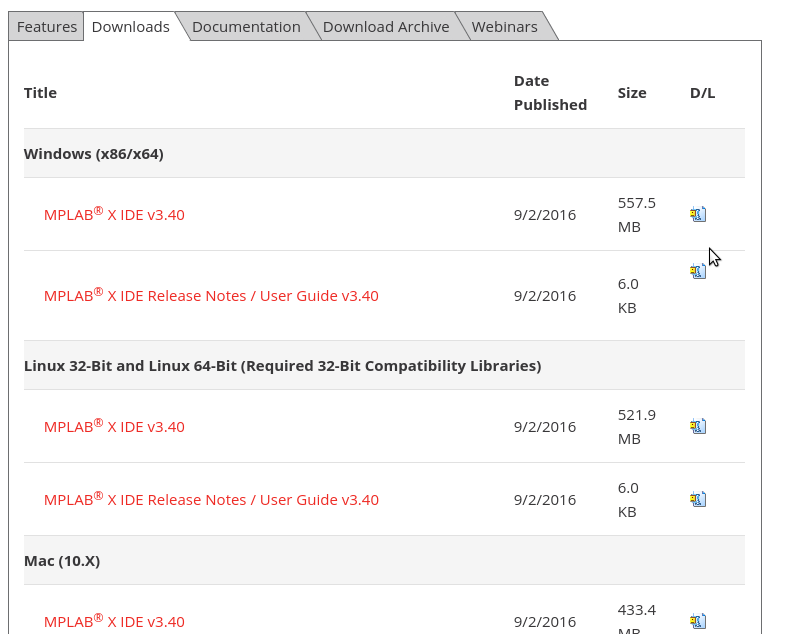
The Microchip MPLABx Integrated Development Envornment (IDE) may be found here: http://www.microchip.com/mplab/mplab-x-ide
Same layout, navigate to the “download” tab, select the MPLAB X IDE for your computing environment.
Once you have the installers downloaded for the compilers and IDE, its a click-and-go on Windows and Mac (from experience). It probably doesn’t matter, but I’ll usually install all the compilers first, then the IDE.
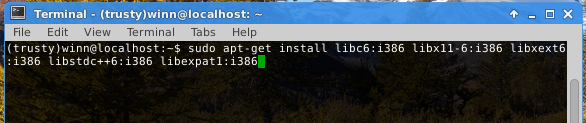
Per the Microchip wikidot, on 64-bit Linux you’ll need to install some 32-bit runtime libraries for the tools to operate:
sudo apt-get install libc6:i386 libx11-6:i386 libxext6:i386 libstdc++6:i386 libexpat1:i386
Then in the console, “cd” to ~/path/to/download/install files, and launch the installers:
sudo ./xc8*.run
sudo ./xc16*.run
sudo ./xc32*.run
sudo ./MPLABX*.sh
*On most Ubuntu based systems, the sudo password is your user password.
Launch the MPLABx IDE:
If you get the MPLABx to launch, its a good success checkpoint at this moment. We’ll go into creating a sample project next.