The state of EV efficiency (2023)

The state of EV efficiency (2023)

Electric Vehicles (EV) are quite the discussion topic today, yeah? Pretty neat stuff, you get an electric motor(s), some number of batteries and go for some distance. Our society and economy functions on access to transportation and ability of people to get to where they need/want to go. Some folks call this ‘transit’. We also care about energy concerns including sourcing, cost-of-use, sustainability, and stewardship of energy, so by extension we should care about transportation efficiency.
Photo by Sophie Jonas on Unsplash

EV Range, Capacity, Efficiency Data

Rather than solely relying on manufacturer quoted spec’s, lets dive into some data provided by third-party reviewers. Listed sources’ “independence” will be left to the determination of the reader, but for the scope of this post we can consider the values reported as reasonably appropriate, as this is a small sampling of not only private “car” vehicles but also considers micromobility options like eScooters and eBikes as they are also both “electric” and “vehicular” by definition.

EV Make/ModelTested Range (mi)Battery Capacity (kWh)Miles Per kWhRemarks
Ford F-150 Lightning Platinum2301311.76
Volkswagen ID4190772.47
Chevrolet Bolt EV278654.28
Tesla Model 3 (base)261584.50
Drive Medical Spitfire Scout 3-wheel90.57615.63Likely Mfg quoted range
RadRover 6 PAS 528.470.67242.37
Aventon Pace 500 PAS 527.880.614445.38
Hiboy S212.70.27047.04
GoTrax XR Ultra120.25247.62
Lectric XPremium PAS 5500.998450.08
Urban Arrow Family310.50062.00Reported long-term average
Trek Allant+ 7 max PAS300.482462.19
REI Co-op Generation e1.1 PAS 535.840.417685.82
Data References listed at end of this article.
PAS = “Pedal Assist” level. Typically quoted as PAS 1-5 with 5 (or “Turbo”) being highest electric motor assist input into eBike drivetrain.

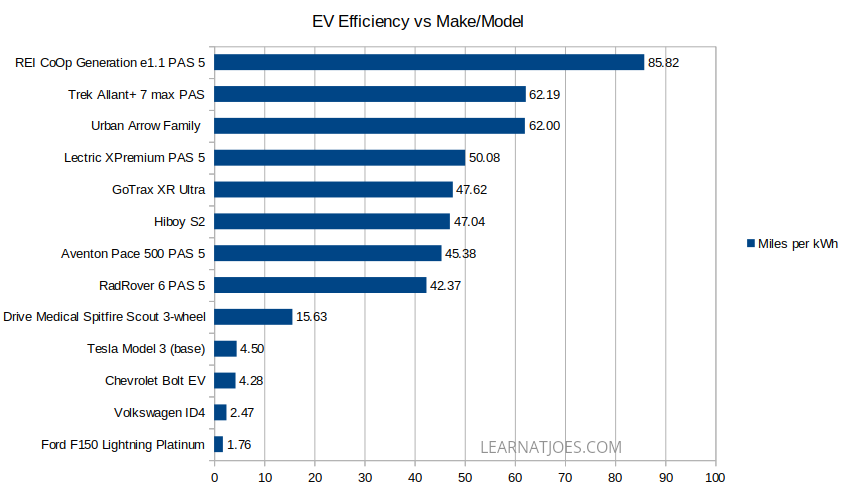
We’ll visualize the efficiency data with a spreadsheet generated chart:
Key Observations

A Childish Omission: I could not locate much (or any…) data on per-charge range for stock/unmodded Powerwheels Jeep EVs.

Mobility for all: When we’re talking about transit and looking beyond car dependency, we have to include folks who do not have access to private car use and might not be physically able to stand or pedal for periods of time. So while mobility scooters aren’t usually brought up alongside eScooters and eBikes, I included a sample above for reference. Though, the Spitfire Scout’s quoted 4.25 MPH is about as fast as a Powerwheels on “High”. Its also the only vehicle listed that uses a 12v lead acid battery and takes 8-12hrs to charge. Seeing that my kid’s eScooter travels twice as fast over the same distance with 1/6 the battery capacity and 1/3 the cost of the Spitfire Scout with a 2hr recharge time to boot, there’s definitely some market disruption opportunity here. However hopefully it’d be a short lived window if more folks get into less sedentary lifestyles, therefore decreasing market demand for mobility scooters.

How much investment for how much return?: While the Tesla is a bit of a halo model in the car space, all things considered from a $579 billion market cap company with so much engineering resources to get so many things working together correctly, its a bit baffling that even they can’t get better than 1/3 the per-kWh efficiency of a mobility scooter for a car. –I’m sure physics plays at minimum a small limiting role.

There’s nothing micro about micromobility efficiency. When it comes to getting you to the grocery store down a few blocks and returning with a few grocery bags, or fetching the next book in the manga series from the library, the distance/energy value from an eBike or eScooter is order of magnitude better than an EV car.

Other Takes:

The eScooter data points (HiBoy S2, GoTrax XR Ultra) are just as efficient as many of the sampled eBikes on the list. That’s a bit surprising to me as I had thought eScooters would be at a by-design efficiency disadvantage from mostly exclusive electric drive propulsion as opposed to eBike electronic assist. OTOH, eScooter total ranges are usually much less than eBikes due to limited chassis real estate for battery cells.

The Front Box Cargo eBike is an unexpected lead in miles/kWh. For those unfamiliar, the Urban Arrow Family is what you’d get if you split the Trek Allant put a high capacity wheelbarrow between the front and rear halves. And hauls cargo it does indeed:

The Recreational Equipment experts really like us being outdoors at affordable cost. Conventional eBike wisdom suggests that hub motor electronic drive-trains are less efficient than mid-drive systems, and that is mostly supported by the data above. (The XPremium, Family and Allant+ are mid-drive). REI Co-op demonstrates with their Bafang hub-motor based Generation e1.1 that system integration design is crucial.
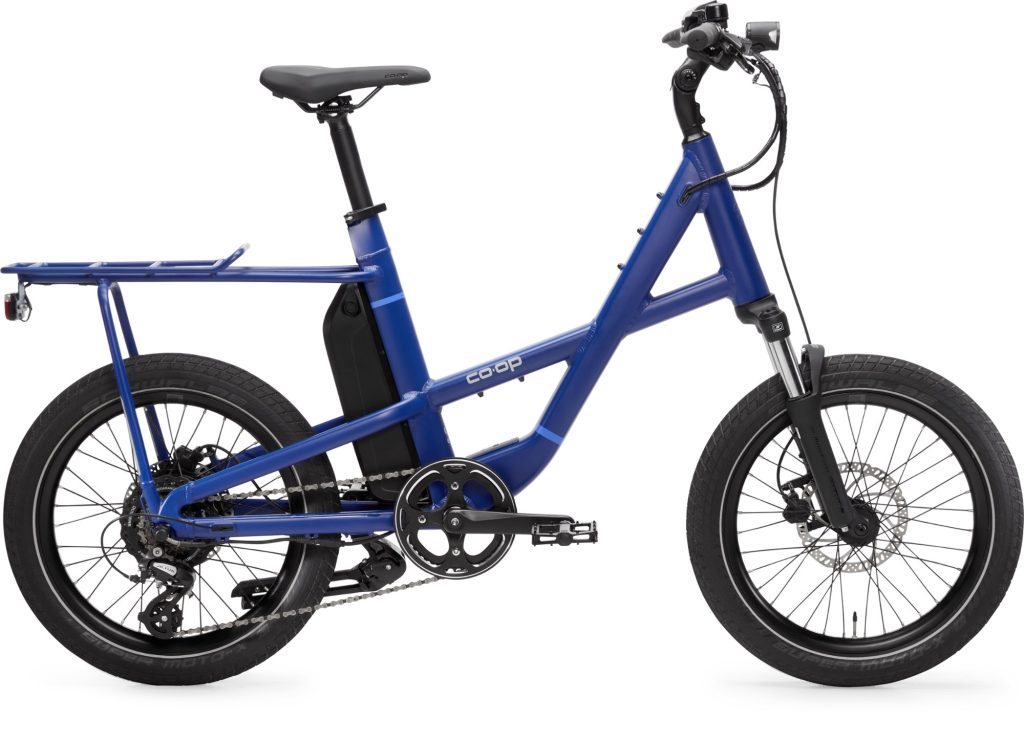
The most efficient eBike listed has a unique, yet functional frame design.

Your actual eBike range will likely exceed that data presented.

  • I purposely selected data samples from highest pedal assist to get towards a minimum expected range. Most folks will typically ride comfortably at one of the lower PAS levels as the bike’s likely fast enough with some rider leg input.
  • The range tests from most of the listed resources seem to run the bike on a test circuit with a static load from beginning to end. While you might return home from the grocery store with 30 lbs of food, the bike is normally only carrying you and a few reusable canvas bags out to the grocery store.

A possible caveat on the data: The tested ranges were done at each vehicle types’ typical operating speeds. So, it is possible that the Tesla Model 3’s efficiency is actually better if ran at 15 MPH. However, to match the efficiency of the least efficient eBike listed, the Model 3 would have to manage 2300+ miles out of a single charge. (40 miles/kWh * 58 kWh)

On Battery Resourcing and Allocation

Battery mining often comes up on EV discussions, as there’s only so much readily accessible and cost-effective minerals to get. Consideration into where the sourced energy storage blocks be placed should be given.

Here’s what 0.5 kWh of battery looks like:
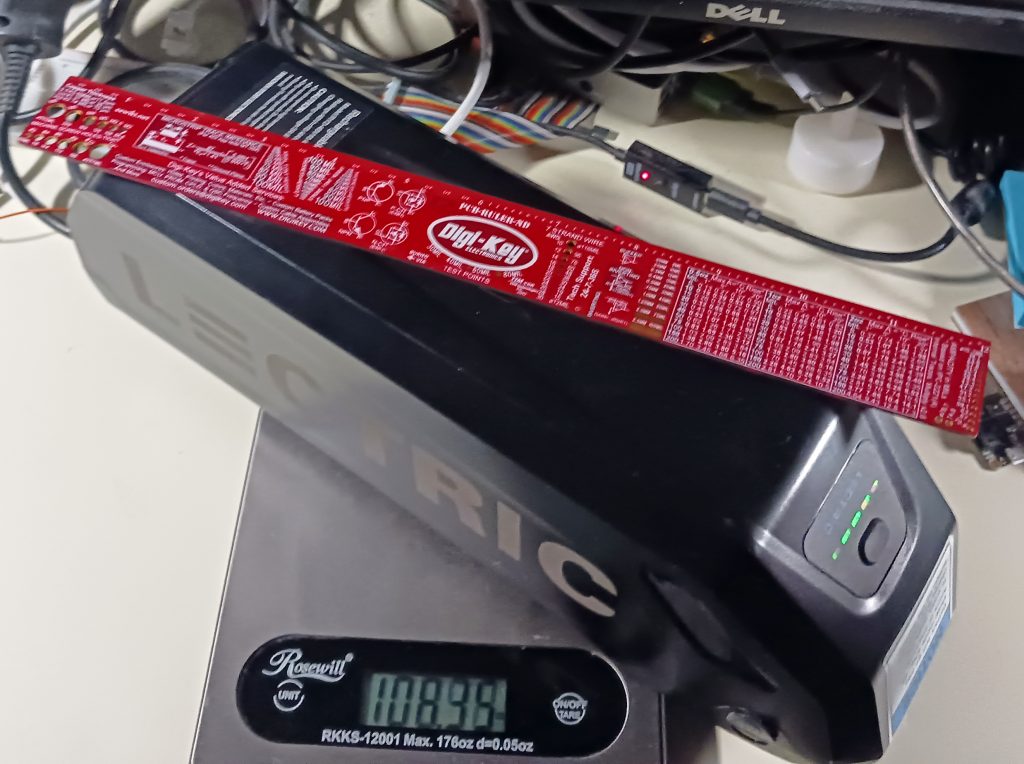
well, 499 Wh to be exact

The various electronic bike component makers will tweak capacity and shape to fit their frame integration and power delivery targets, but for the most part volume is volume for equivalent battery chemistry and topology.

Ignoring packaging and such, it’d take ~130 of these blocks to fill the capacity of a Chevy Bolt to enable one 1-5 people to get around town. That same 130 packs could power 130 moderately priced e-Bikes to move 130 people around town, or they could be split into 260 “half-packs” to get 260 people scooting around.

Kill the car you say? Well, no. We USA residents need to occasionally get between towns not connected by reliable mass transit. A fully electrified transportation household of 4 might own 130 or so blocks for the family car + 1 per person for local micromobilty vehicles.

Putting in 2x Chevy Volt or 260+ bike battery blocks into a F-150 Lightning? Technically yes, the EV powered truck is lower cost to operate than the gasoline model. But the few truck owners I know use their trucks to get out into remote wilderness for hunting/recreation for days at a time, or out into undeveloped spaces to build them into developed spaces. If they want/need high capacity 120 or 240 VAC power, they have to pack a generator with operating fuel for them. The tested 230 miles “tank range” seems low even for pickup truck standards, and its dead last on electric efficiency. A survey of 260 would-be bike riders or 520 would-be scooter riders might likely support that F-150 being fossil fueled for doing truck things if the EV industry has to decide where to deploy battery cells.

What are we supporting/subsidizing and for what reasons?

You don’t have to spend hours watching YouTube content to start wondering if public policy actions match their claimed purposes. I just did one small analysis here, you and others are welcome to perform the same study or other evaluations. Some closing thoughts to ponder upon:

  • Which is more effective at reducing gasoline car use? A Car EV tax credit or an eBike rebate?
    • Reduces which car use? Local in town, or between cities? Which mode is more often used? Which mode is more detrimental to air quality and other environmental concerns?
  • Are there alternative examples in the world that don’t require households to finance, register, and insure a private car vehicle “just to get to work”?
    • What do those options costs us compared to expanding our existing car-first infrastructure and EV charging network?
  • If you are an able bodied person yet “need” to use a 4 wheel EV car of 2-4 miles/kWh to get 2 miles to the grocery store….Why is that so? Who made those decisions?
  • …and so on.

Data References

Cypress PSoC 4 BLE Find Me Demo

Cypress PSoC 4 BLE Find Me Demo

Another day, another Bluetooth Low Energy (BLE) SoC. This one is by Cypress (not Hill, but now it’s Infineon). The PSoC 4 BLE SoC is the micro that is featured on the CY8CKIT-042-BLE-A kit.

I recently started working with other Cypress PSoC micro-controllers, so for me trying out the BLE variant isn’t too much of a stretch. It does seem that the integrated Bluetooth SoC market is getting more crowded every quarter, and Infineon is positioning against a couple other major vendors.

What PSoC offers with their BLE solution is a very powerful and customizable programmable hardware block that enables system designers to easily configure peripherals and custom component and logic blocks at the hardware level with minimum firmware hand-holding.

This CY8CKIT-042-BLE-A evaluation board, like many other modern kits, include Arduino Uno based expansion headers to allow for quick prototyping with custom expansion shields. Don’t forget to check out the JoeLABs Expansion Shield Special to help you kickstart your next project!

Cypress/Infineon has a PSoC 4 BLE 101 series of videos that are helpful towards understanding and getting started quickly with the platform.

STM32 + FreeRTOS on NUCLEO-L152RE

STM32 + FreeRTOS on NUCLEO-L152RE

STM32 + FreeRTOS on NUCLEO-L152RE

In this episode, we look at the NUCLEO-L152RE to get started on a STM32 platform running FreeRTOS. After following a straightforward set of instructions to bring up the system, we look at demonstrating a use case that benefits from an RTOS (Real Time Operating System) environment.

The NUCLEO-L152RE development board features an ultra-low ARM micro-controller from the STM32L series. The family of NUCLEO boards facilitates evaluation and rapid prototyping with on-board debugging and provides design extensibility via the included Arduino Uno R3 header interface to support integration with off-the-shelf and custom Expansion Shields.

Digi-Key has published a handy guide on getting started with FreeRTOS on the STM32 platform, with a good introduction to the FreeRTOS, briefly discusses where it may be desirable to incorporate an RTOS into a system, and offers specific pointers on getting started with FreeRTOS on the STM32 platform.

The JoeLABs Expansion Shield Special!

Don’t let chip supply chain shortage stop you from building out your hot idea! Pull out that development board hiding in one of your parts bin (or buy one that you can find) and make use of the Arduino Uno R3 header interface! Ask about the Expansion Shield Design Special at JoeLABs!

Intro to Pulse Width Modulation (PWM)

Intro to Pulse Width Modulation (PWM)

In this episode, we cover the basics of Pulse Width Modulation (PWM), and use an Arduino with quick-and-dirty code as demonstration.

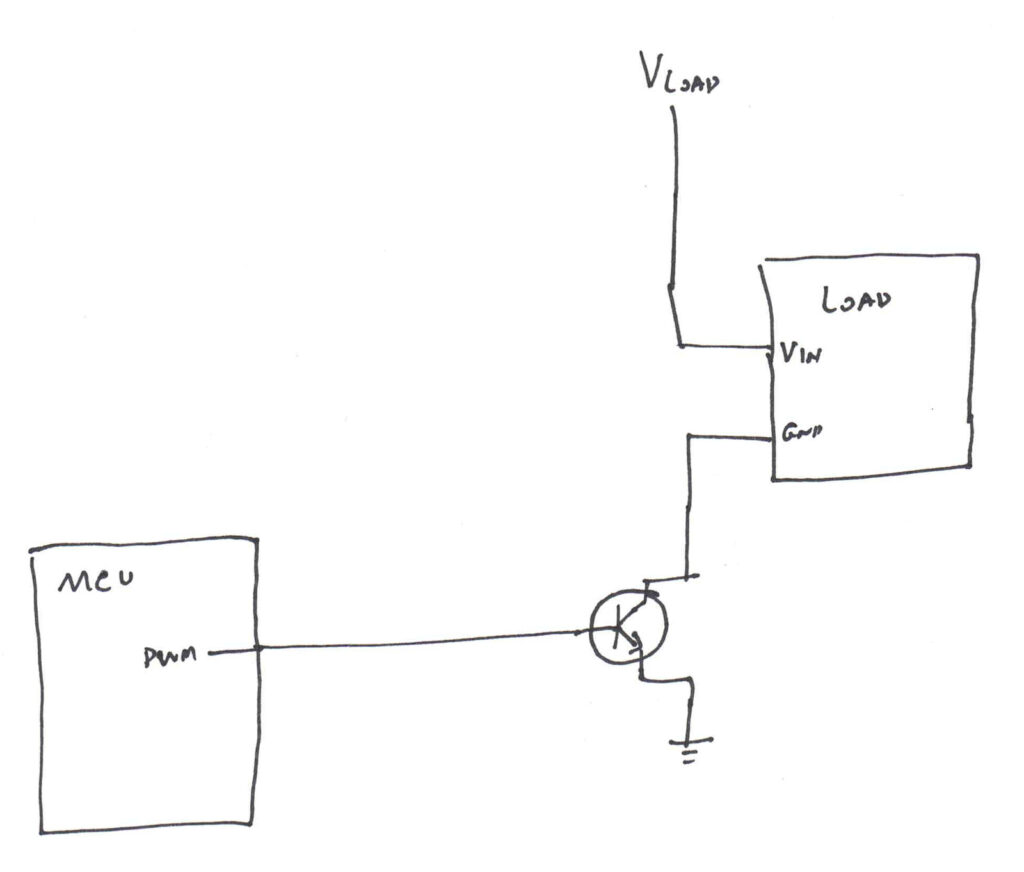
PWM is useful when we need to modulate a load output (e.g. motor, fan, light) that takes in a specific voltage supply, and just lowering the input voltage may not be appropriate or desired.

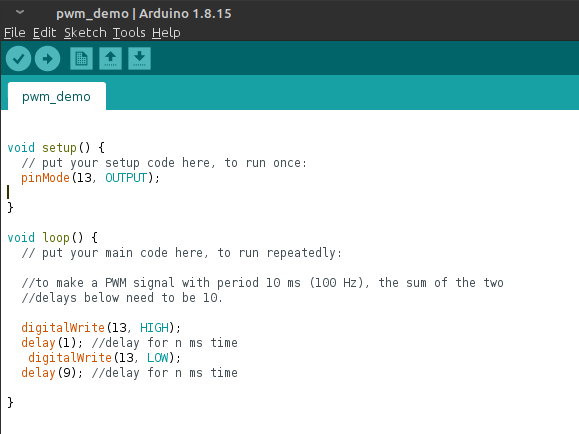
Below is the Arduino sketch featured in the video. I copied this Arduino code from my kids’ schoolwork, because I gave them this same lesson earlier in the school year for (computer) science class.

Source available at GitHub

Would you buy a car with the hood welded shut?

Would you buy a car with the hood welded shut?

This post’s title question is a quote from Red Hat Linux founder Bob Young, emphasizing the benefit of open source software allowing you to inspect and modify your software tools.

This hood was “welded” shut by the clone tool using GIMP.

Let’s take some creative license with the car analogy.

Would you buy a car that has the battery riveted into the chassis? Let’s say doing so frees up the engine bay a little and allows for a larger battery than the standard cubic 24F battery since its custom shaped into a body member cavity. I would wager most folks would balk at this design choice knowing that batteries expire within a few years and would rather be able to replace the battery without also needing to swap out the front quarter body panel.

Would you buy a car whose engine has the water pump, alternator, A/C compressor, and power steering accessories welded into the engine block instead of conventionally bolted on? While we’re at it, turn them all internal facing so they’re driven by a sealed chain. Let’s propose that permanently fusing these accessories into the engine at the factory nets some performance increase and allows the car designers to shave 3 inches from the engine bay and give that space gain into the passenger cabin. I can almost guarantee someone living in Florida, USA during a humid summer season being told their A/C compressor is broken and has to get a whole new engine put in isn’t going to care as much about the few HP or foot-well room bought by the “fully integrated” engine design.

Now, my examples focus more on the hardware serviceability side of things. But it is important nonetheless because such measures preventing you from maintaining your systems within practical reason have encroached gradually over time with little protesting.

Non-user replaceable batteries have proliferated across most contemporary smartphone offerings, thereby placing a hard limit to use life as service life of Li-Ion batteries is just a few years regardless of use duty. Batteries internally glued to the chassis has been a feature on several higher profile laptop models, making repair a potentially dangerous undertaking.

RAM modules soldered onto the motherboard instead of installed into slots isn’t exactly a new invention — I saw it on a couple lower-end Intel-486 based desktop computers back in the mid-1990s. As those models were marketed for institutional use, my guess is it was due to budgetary reasons. Modern laptops that use soldered RAM will claim it helps thin the chassis (whether or not it matters to the target clientele). Granted, for some slim focused ‘s’ notebooks the tradeoff may be warranted, but is odd when an productivity oriented, unashamed thicker ‘T’ notebook uses soldered RAM. Although RAM failures are quite rare these days, a non-replaceable module is yet another unnecessary system failure point.

Back to my fully integrated engine thought from earlier, soldered RAM (and soldered CPU) may be a non-issue for the appropriate target audience who might be more willing to scrap the entire system of either of those parts started acting up. However, bundling the non-volatile data storage within the weld is asking for trouble no matter the end user. Within such a system, if the main board becomes inoperable for whatever reason (bad power rail, water ingress, exposure to leaked battery acid, etc) the user data is not retrievable. Not only that, SSDs themselves are a consumable component with a finite (although usually long) erase/write life and also not immune to controller silicon failures.

Its easy to envision the not so pleasant future where even though you purchase computing hardware, you really only lease them. The ‘just don’t buy it’ doesn’t always cut it because its not just one offending company, nor is it limited to computer hardware.

The debate on right-to-repair may be promising, but it is a complex discussion with many intricacies that can trip up most legislative bodies who are distracted by the lobbying parties of interest while (hopefully) balancing the reach of government.. Impactful and straightforward, yet non-draconian directives may be hard to come by. How do you go about mandating design for serviceability at the legal level with non-ambiguous verbose? Is it “serviceable” if a board or module can be swapped out, or is the requirement satisfied only with schematics, firmware, and access to vendor specific custom chips?

The mitigation options readily available for preventing computing failure fallout includes redundant data backup/recovery measures, and fallback computing systems at the standby.


Nordic nRF52840 DK Bluetooth SoC Evaluation Board

Nordic nRF52840 DK Bluetooth SoC Evaluation Board

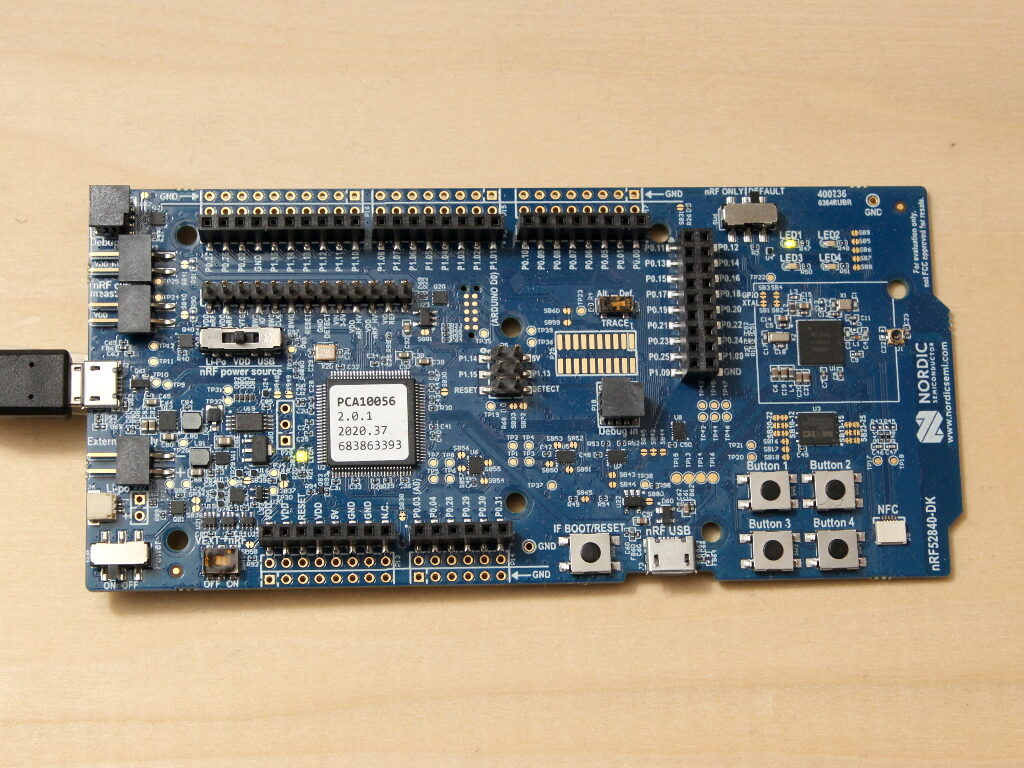
In this episode we will have a quick overview of the nRF52840 Bluetooth SoC and Evaluation board.

The video segment discusses Nordic Semiconductor nRF52840 SoC, which is the top end offering of the nRF52 family of Bluetooth integrated SoC. A demonstration of the evaluation board and sample application is also presented.

Nordic has a strong market share in the embedded low-power Bluetooth connectivity space, in no small part due to their silicon offerings as well as developer support via their InfoCenter documentation andDevZone forum.

The featured evaluation board is a reasonable priced platform to get started investigating Bluetooth connectivity and designing peripheral circuits to integrate with the system for platform prototyping.

Get wired for speed

Get wired for speed

Disclaimer: As an Amazon Associate I earn from qualifying purchases

For home and/or office networking, wireless is convenient and as Wi-Fi standards evolved the performance has progressed. Despite technological advancements, wireless networking still lags behind wired gigabit Ethernet in practical use.

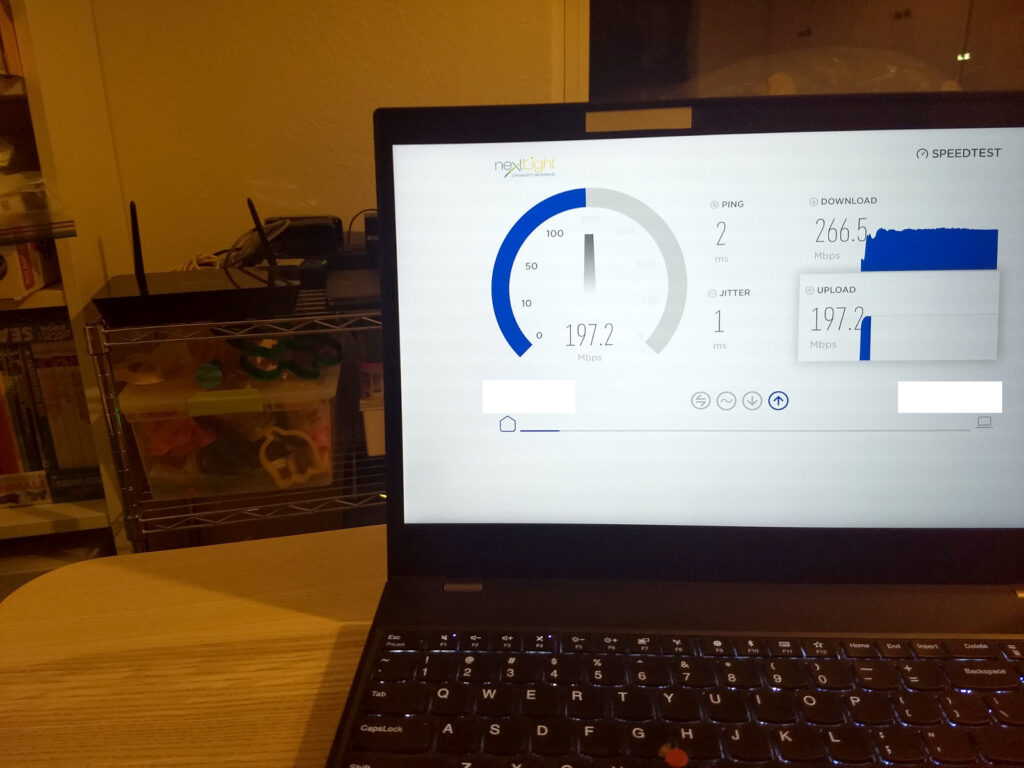
Here’s my mobile battle station just a few feet away from the network router connected via WiFi.

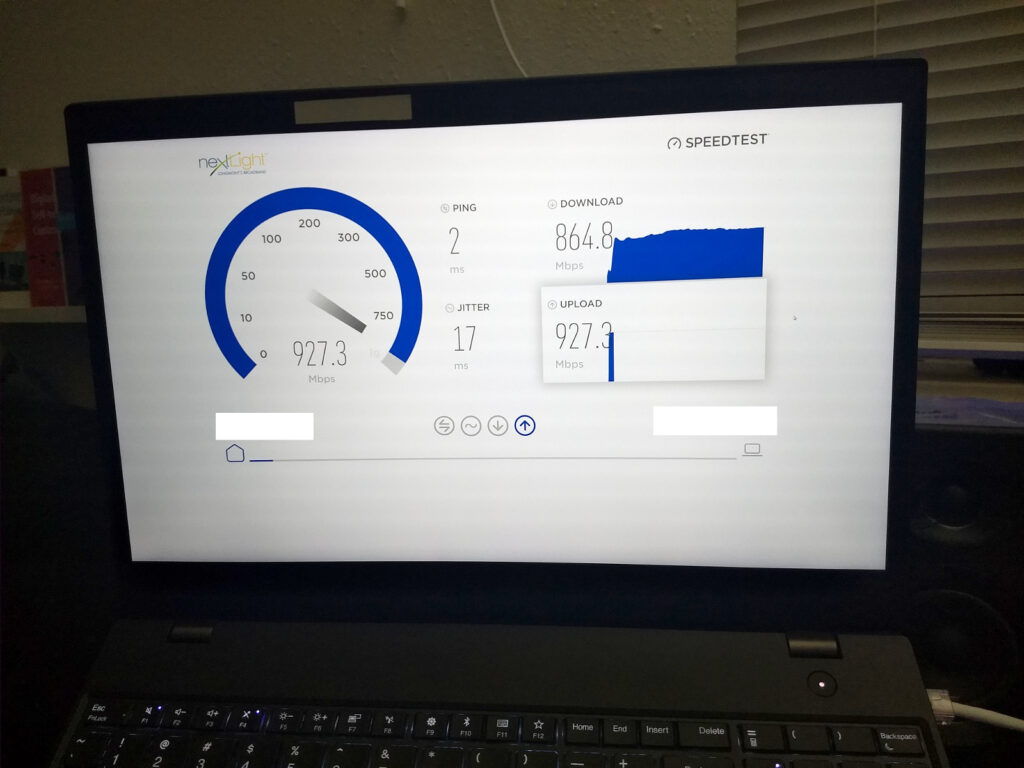
The Dual Band WiFi Router claims “Up to 300 + 867 Mbps” over the AC WiFi, with an asterisk. Real practical in-situ results as shown using WiFi AC equipped laptop.

And the same laptop across the house with the same configuration (unplugged power adapter) but attached to Ethernet.

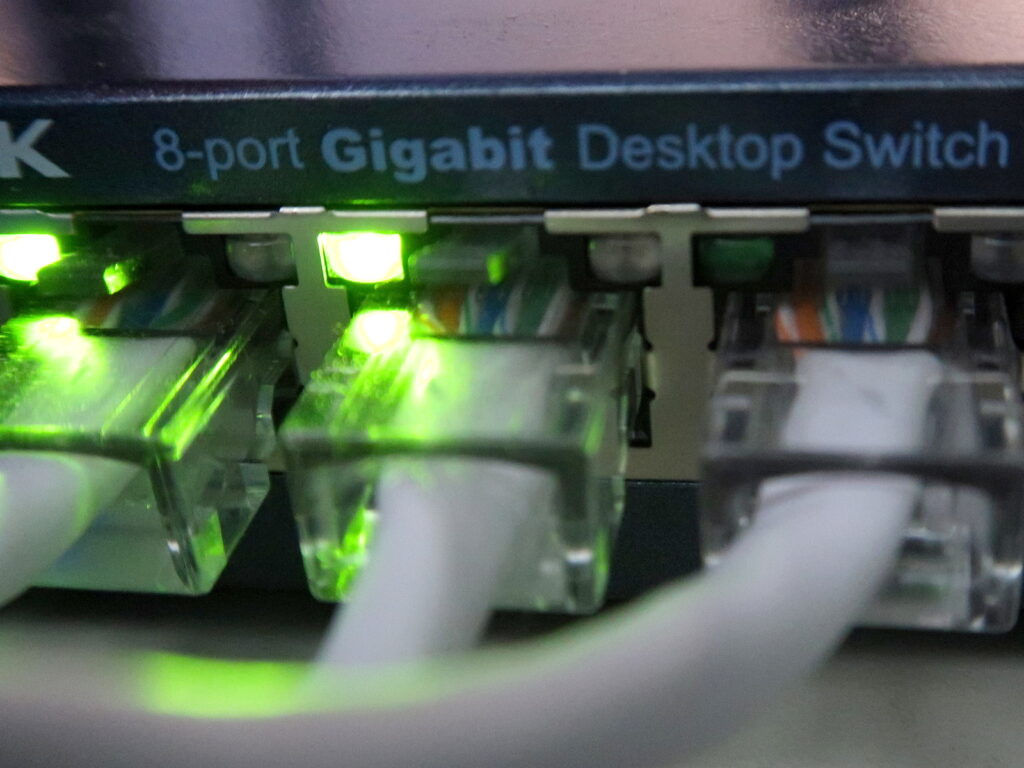
Gigabit adapter on laptop attached to network switch connected to one of the gigabit ports on the router.

The link speed of the Ethernet connection is always 1 Gbps. The WiFi link speed fluctuates for whatever reasons and for me the reported link speed changes significantly when active vs. idle.

Even if your internet service speed is less than gigabit, local network access between computers for file/media shares, automated backup, and the like also benefit from 1000 Mbps transfer capacity. Over SSH/SFTP I usually see around 95-100 MB/s transfer rate copying large files between computers.

Got the need for speed? Good. Here’s an easy quick start:

  1. Obtain a Cat5e cable of desired length.
  2. Attach one end to the one of the gigabit ports on the router
  3. Attach the other end to the gigabit LAN port on your computer. –If your sleek ultra-thin laptop lacks an RJ-45 port, consider a USB-c Ethernet adapter or USB to Ethernet adapter

Do the same for another computer and you should be able to move bits between them much faster than over WiFi.

If all your computers are in the same room as your router, or you don’t mind having wires run and taped along the hallway, you’re good here. Read on if you want to possibly put in a clean and tidy installed network run within your home

**Usual disclaimers of your own risk and responsibility apply in regards to working on your own home or with permission from property owner. Only you or your hired contractor can judge the most appropriate work actions for your home configuration.

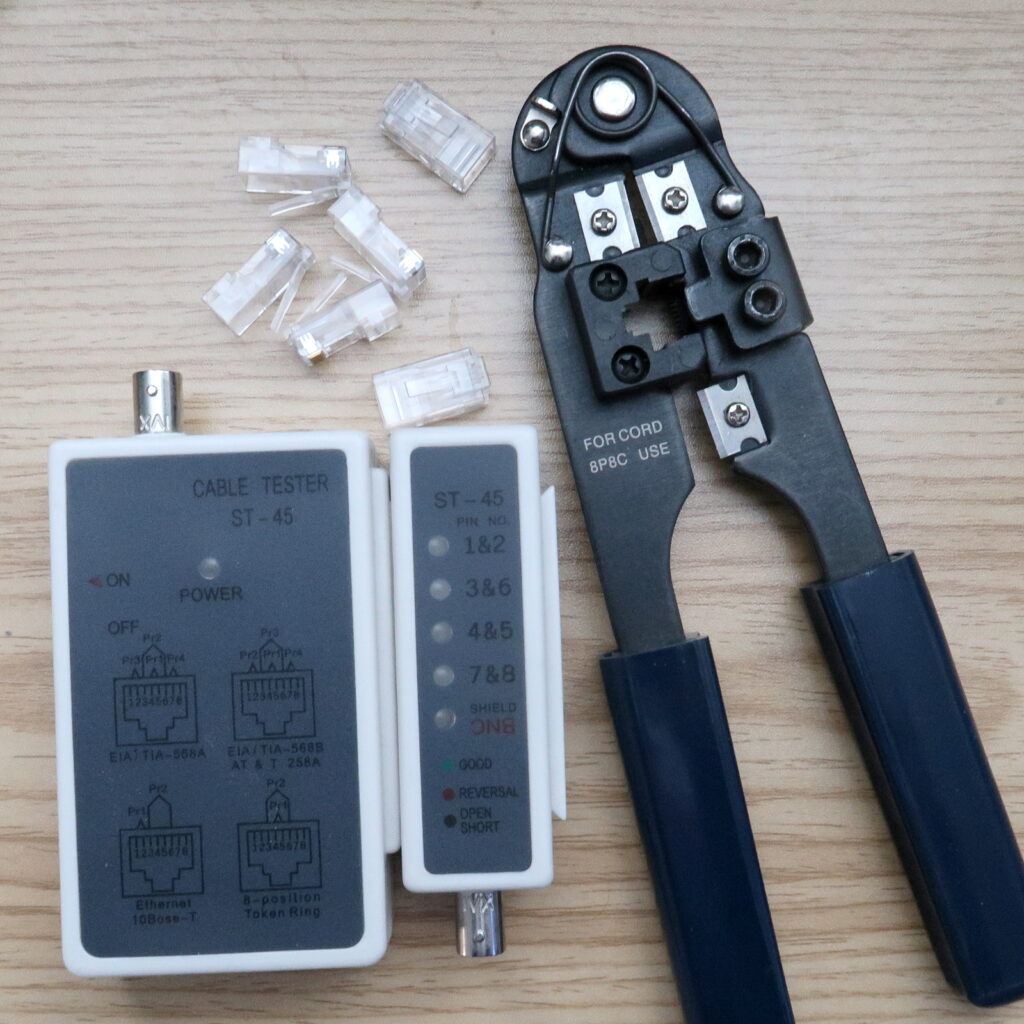
To run Ethernet throughout your home, you’ll want to start off with a Cat5e Ethernet Cable Kit that for a reasonable price should gets you a bulk supply of Cat5e cable as well as connectors and handy tools.

Your kit should include a bag of RJ-45 connectors, a crimping tool, and a cable tester.

You have to know your home to figure how to approach your home wiring runs. I can go over what I’ve done in a few scenarios.

When I lived at home when we still had carpet, an easy and minimally intrusive method was to tuck the Ethernet cable underneath the baseboard behind the carpet edge, and terminating the ends with an RJ-45 Jack and installing it within an RJ-45 surface mount box.

Tuck the cable out of sight. Be cautious of the nail strip holding the carpet in place.

A Fish Tape tool can help continue a cable run underneath a carpeted doorway.

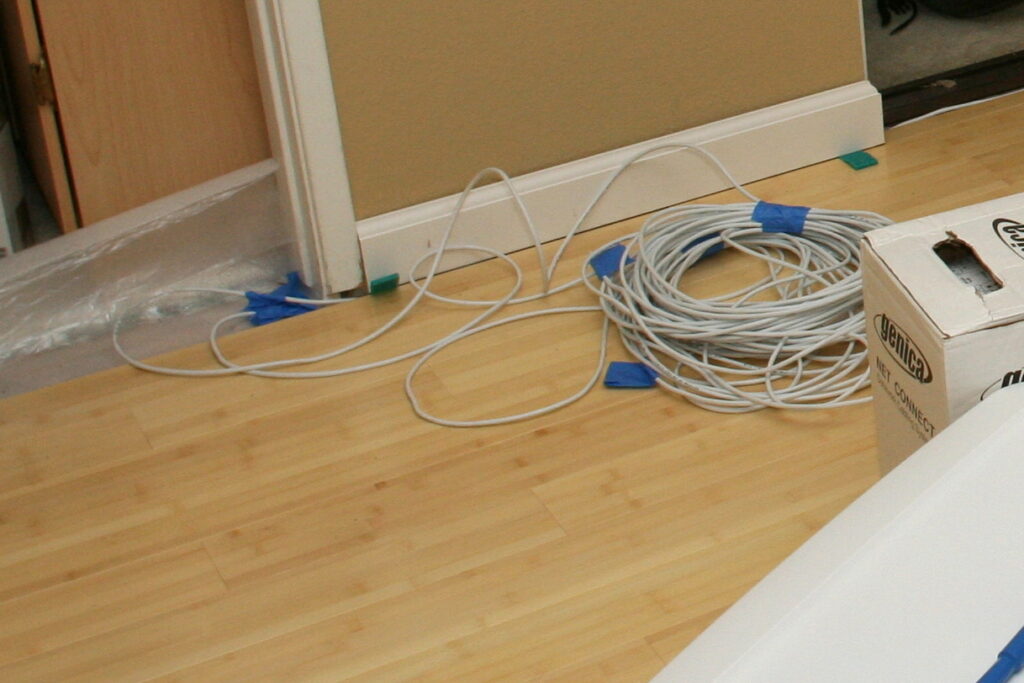
In another home, a wood flooring project was the perfect opportunity to run network cabling within the expansion gap between the flooring and the wall.

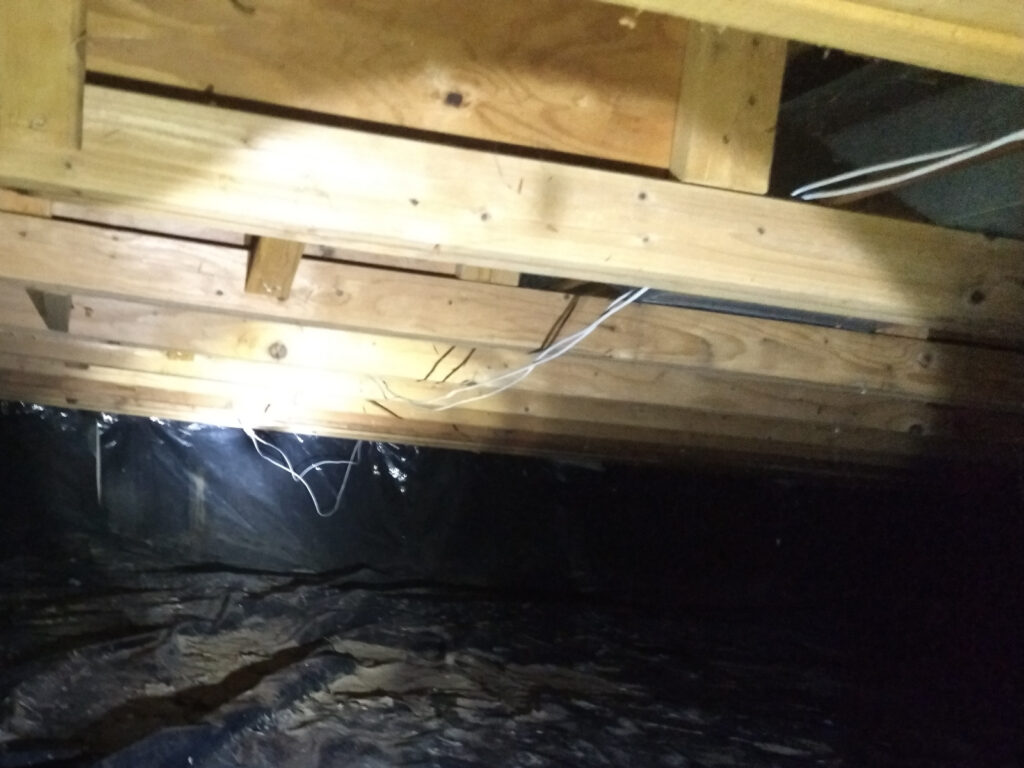
In our present dwelling with wall to wall tile flooring already installed in half of the house, I ran the wiring through the crawl space.

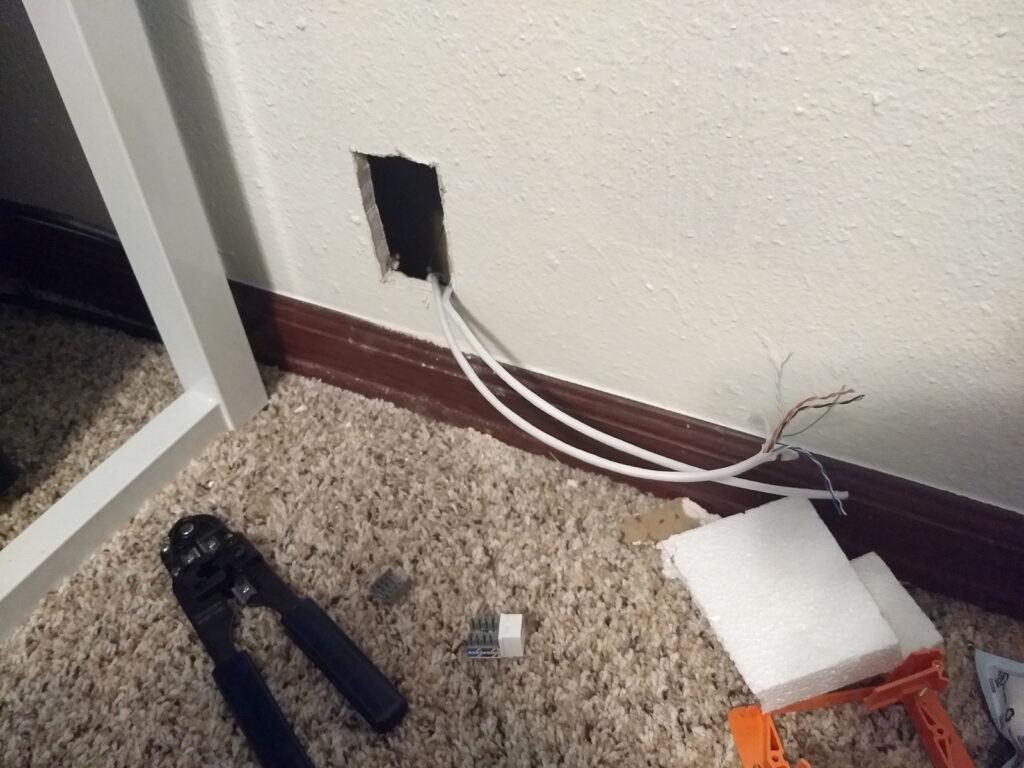
With a stud finder, I was able to plan out the drop locations and cut out some drywall, drill some holes through the sub flooring and pulled the cables through.

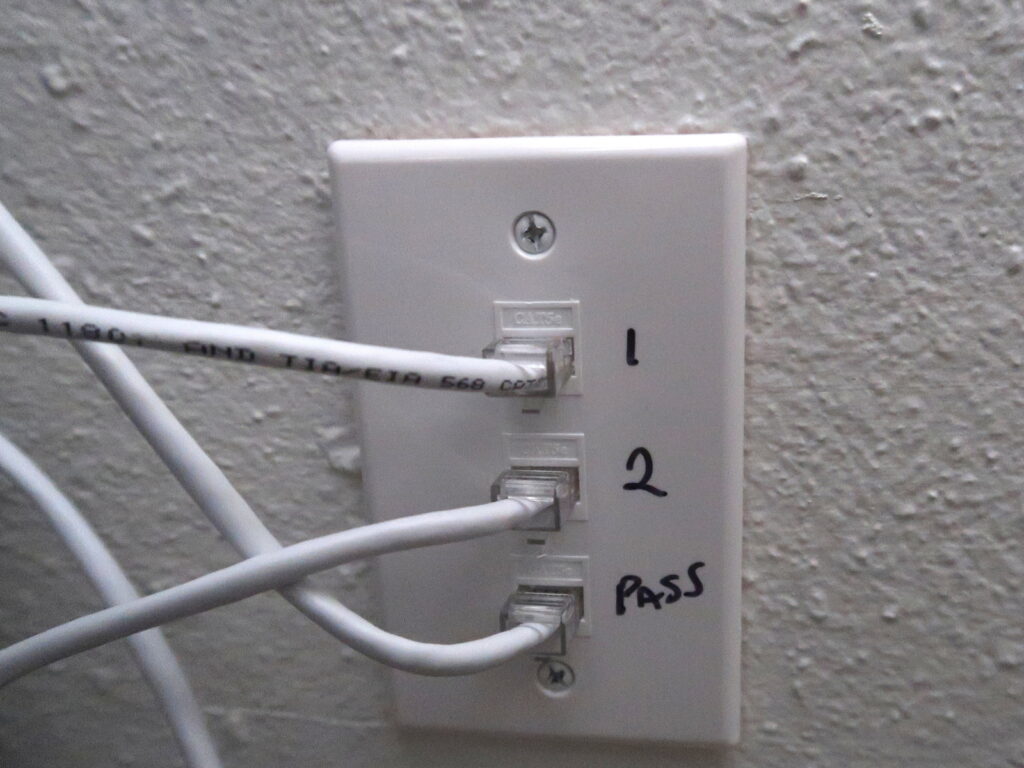
I then finished off the wall with a low voltage mounting bracket, terminate the wires with the RJ-45 jack and installed it within a nice looking wall plate.

With a pair of known good Ethernet cables you can test the end-to-end connection jacks with your kit cable tester, as well as testing the custom length node cables you’ll make with the leftover bulk cable, crimps, and crimp tool.

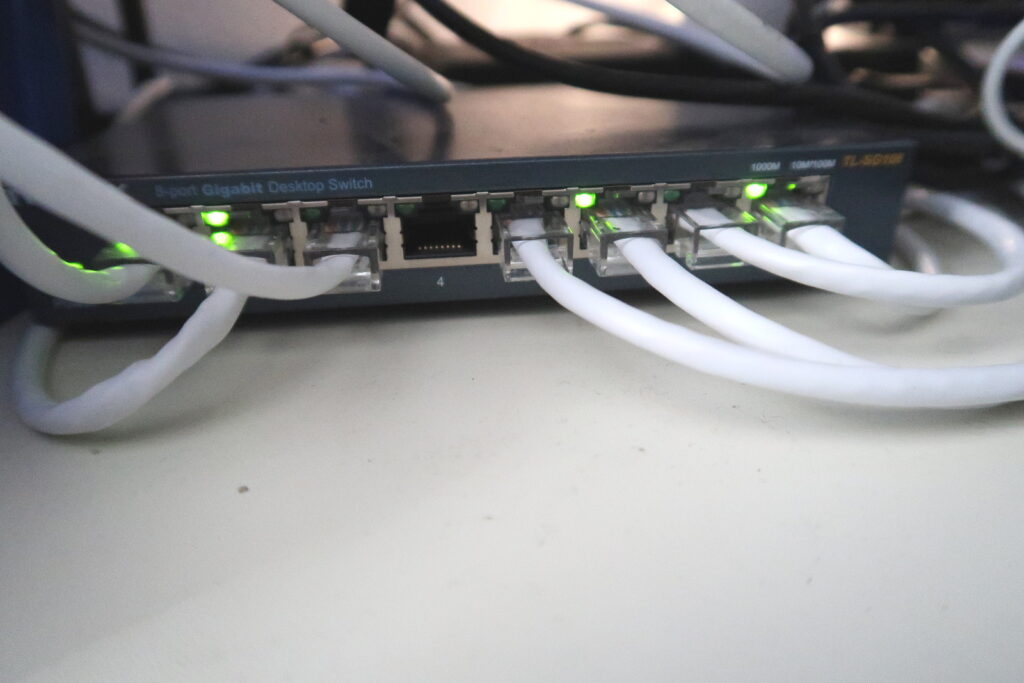
To fan out your connections from the wall jack or wall mounted box, run a cable from the wall to a network switch, then attach the computers in the room to the switch.

With a small outlay for hardware and time commitment, you can enjoy years of reliable network connectivity within your home/office for work and leisure.

Addendum: If you do plan to cut holes within your non-new build home, be prepared for any surprises. Like, this gent and some of his buddies were hiding behind the wall I cut open.

Be well lit on your video calls

Be well lit on your video calls

Disclaimer: As an Amazon Associate I earn from qualifying purchases
Photo by Sam McGhee on Unsplash

In the era of video conference calls, practically every work desk has become a mini-studio setup equipped with web cameras and headsets interfaced with an array of collaborative platforms. Lighting, despite being just as important to your presence presentation, often tends to be an after-thought as evidenced by silhouetted faces and harsh shadows among your meeting’s gallery view.

Of course, with physical space permitting you could look into some Softbox Lighting Kits to Zoom your way to the Most Photogenic Teams Player. Indeed I have found such lighting kits fun to use and are of great value, but understandably might not be appropriate for a smaller dedicated workspace.

At minimum for overall reduced eye strain is to have a desk lamp to illuminate your general working area, as well as doubling as a light source for your video feed.

I tend to favor the articulating arm kind of lamps as they can be positioned downward to a specific area of interest to aid in minute tasks like PCB assembly or focused reading. OR to borrow from photography practices, can be aimed towards the ceiling to produce a soft bounced light effect. The gentler, well defused lighting avoids that “deer in the headlights” look from having a major light source pointed straight at you.

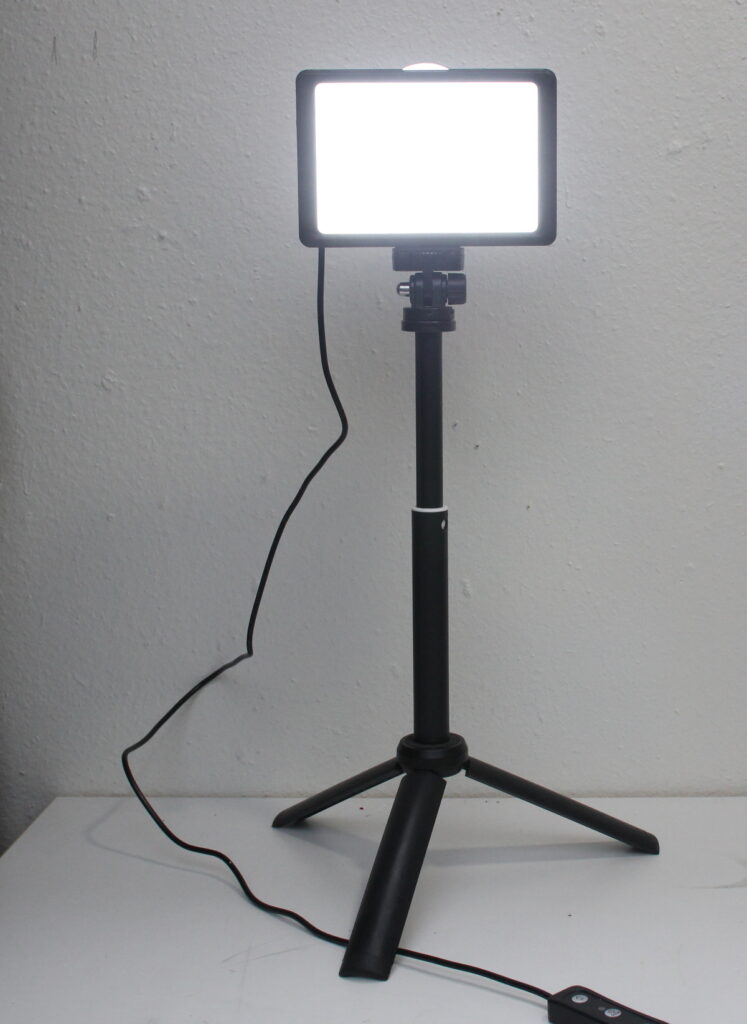
A more directed video light can be used to fill in the shadows that naturally occur on your face while on camera. This compact, yet versatile Neewer kit has been my battle station’s MVP.

This video light is USB (USB-A) powered and with its minimal power draw should work with practically any computer or mains USB port/charger. The included tripod is height and tilt adjustable.

Best of all, the light output is dimmable via an in-line controller to let you dial in the fill light to match ambient conditions.

Unless you’re going for that streaming gamer vibe, or just going to use a software superimposed background effect, you won’t want to forget about background lighting if your room is dim during your conference. An overhead light can be switched on if needed, or positioning a floor lamp in a corner to help.

Cheers to improving your presented image while reporting out your project progress and status in the morning, and showing off the kids brightly in the evening family call.

LPT: If you’re using a computer for work, One is None

LPT: If you’re using a computer for work, One is None

About a year ago I had a conversation with a professional friend about our work arrangements at the time, and what we’d do in terms of bench setup if we each were to do full-time independent consulting and contracting. Almost immediately we unanimously agreed on having two (2) computers.

The rationale is pretty obvious: loss of use of computing tools for design and development is a major risk to revenue when you’re the invoicing party. However, being stuck in the water when your only corporate issued rig gives up isn’t fun either.

I was reminded of that think-storm session earlier this week, right in the middle of a rather intense sprint.

Fortunately, it’s still able to boot after entering Startup Settings and toggling an option. But I have to do it every time now.

Luckily, this halting-on-boot laptop wasn’t the only computer I have for development, because otherwise it would have been very inconvenient in the project support, and a potentially major hassle should major servicing be required during COVID-19 shelter-in-place.

I experienced no loss to productivity because I perform most development with another computer that is my daily driver. On the table next to it is my secondary computer, which while not identically configured, can stand in with the same tool chains should need arise.

Of course, a sound data backup and recovery plan is always necessary and most people (hopefully) have that in mind, especially as some computer models tightly integrate storage modules rendering recovery difficult when the system fails to operate. Redundancy in workstations and other important tools may not often be in the forefront of thought, but is an important consideration. Even if you’re able to pick-up a new computer from the store within the hour, it may take a day or so to load up your software tools to get back to being productive.

It took me a few months to determine the most appropriate redundant systems strategy. At first, I had thought of keeping two mostly identical computers but realized quickly that one of them would most likely collect dust. Two exact setups are also potentially vulnerable to same-time failure if for example, the OS vendor pushes out a faulty automatic update.

I presently settled upon maintaining complementary platforms that are able to either host cross-platform tools natively and/or virtualize operating environments that can be replicated. This way, the computer resources all get utilized on a regular basis and have enough overlap should one fail at an inopportune time.

Virtualize your Virtual Meetings

Virtualize your Virtual Meetings

Q1-2020 has featured audio-video conferences in the spotlight. While the benefits and value of remote collaboration is greatly acknowledged and appreciated, there are some privacy and security concerns that come along for the ride.

Photo by Brooke Cagle on Unsplash

What video conference/meeting vendors do with account access and account data once on their platform is really up to their practices. However, for concerns regarding what the vendor client tools might do in regards to residual background processes or adding additional unwanted software packages, you have some mitigation options through containment.

  1. Dedicate a computer for conference meetings.
    • Vendor clients have no access to local data on your primary workstation due to air-gap.
    • Yet another computer to own and maintain. Won’t allow you to directly share content you might need on your primary workstation, unless you go through setting up network file sharing which is not without its own concerns.
  2. Dual-Boot: One computer but two disks/partitions. Similar pros/cons as dedicated computer.
  3. System Virtualization.
    • Can run in parallel within your workstation in it’s own container. No to (relatively) low hardware cost. Can share content with your host workstation through VM filesharing.
    • Your Performance May Vary. Definitely will want to do some preflight testing and have a backup ready to go should system fail to perform adequately during a call.

For our discussion, we’ll focus on virtualization. Before we continue…

THE DISCLAIMER: The contents of this article are intended for your personal use on your privately owned computing tools. Please adhere to your company’s policies and usage specifications for software, subscriptions, and computer tools provided to you for company use. DO NOT use this guide to circumvent company IT policy. Don’t blame me if Nick Burns your Company’s Computer Guy becomes angry and sarcastic with you. Other usual at-your-own-risk, no warranty, no liability disclaimers also apply.

Oracle Virtualbox is a free virtualization software that runs on Windows, Mac, and Linux hosts. It allows you to setup a virtual computing environment and allocate CPU, Memory, Video, storage, USB, file, etc resources to expose to the virtual …box.

For “Guests”, that is, the operating system running inside your container, Virtualbox supports several systems. However, Linux is free and easily accessible. I suggest Linux Mint.

A note on versions: The procedure in this article uses a Linux Mint 18.3 XFCE Host, using VirtualBox 5.2, and running a Linux Mint 18.3 XFCE guest. For whatever reason, the GUI presented in VirtualBox 6+ doesn’t play well with my 4k/UHD display, and Mint 19.3 apparently needs a Video Controller option that is only presented in VirtualBox 6+ to work correctly.

Download and install the VirtualBox software, and the associated extensions package. Then download the Linux ISO of your choice.

In VirtualBox, press “New” to create a new system profile.

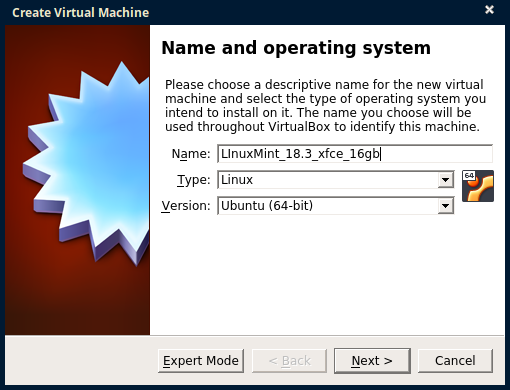
Give your new system a name, set the type to Linux, and select the closest “Version”, then press Next.

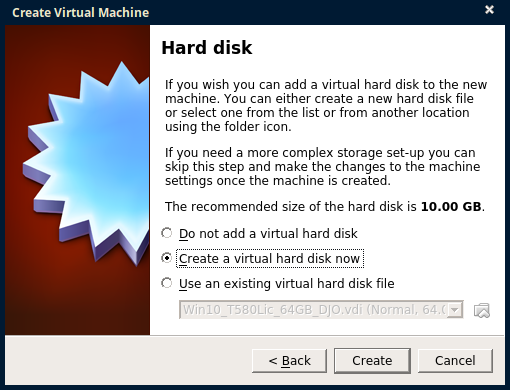
Select “Create a virtual disk now” and press Create

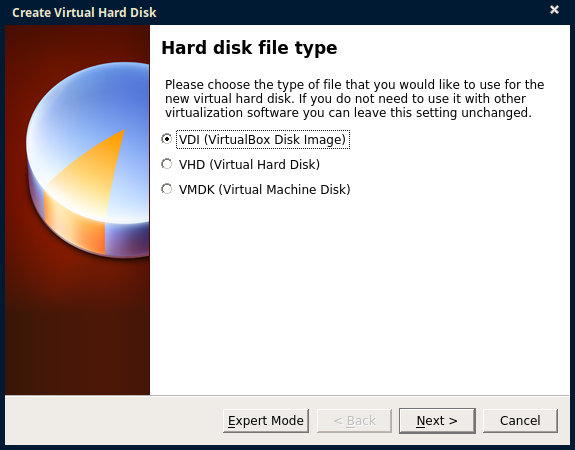
Be sure that VDI is selected, and press Next.

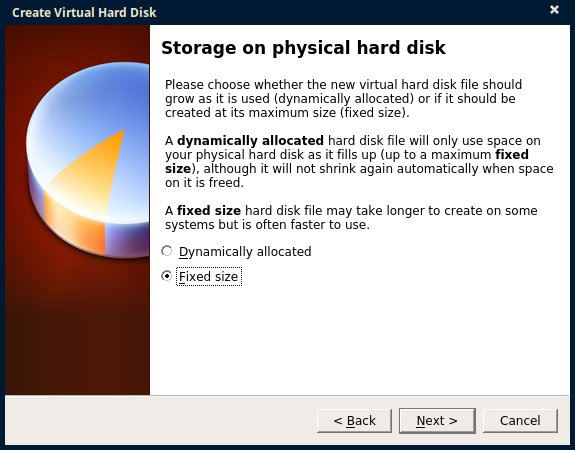
I’ve only ever used “Fixed Size” because I have the Need for Speed

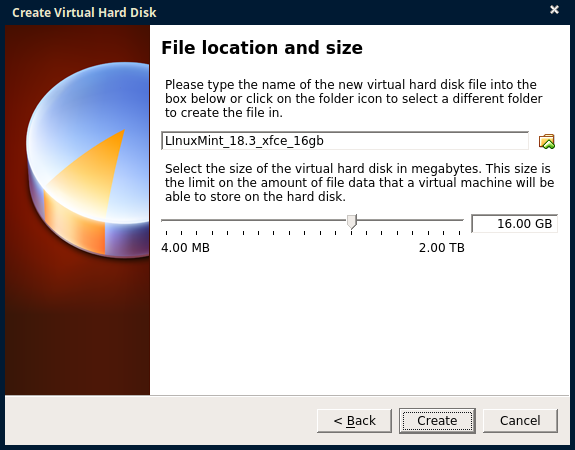
For your ‘physical disk’, give it a name/location, and size it just a little more than the minimum system requirement.

Wait for the virtual disk to be created. If the disk is created on an SSD, it won’t take long.

In the left panel of the VirtualBox utility, right click on your newly created system and select “Settings…”

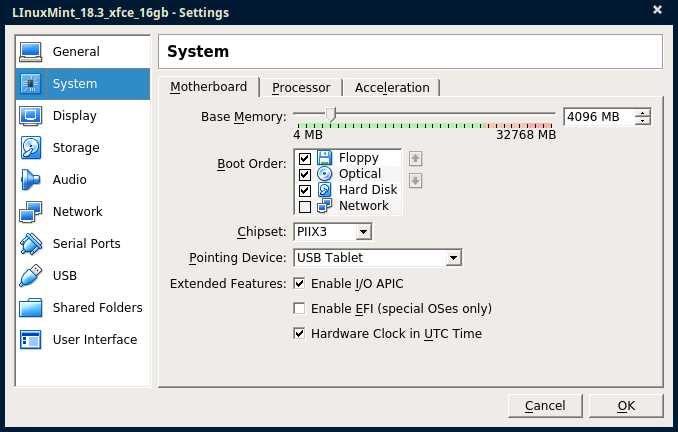
Select “System” in the left pane, and within the “Motherboard” tab, give your virtual system at least 4 GB (adjust more or less, now or later, depending on the performance you are achieving, or available physical memory).

If you don’t have that much physical memory to allocate, now might be a good time to fill in that extra RAM slot on your computer, or swap out to higher density modules.

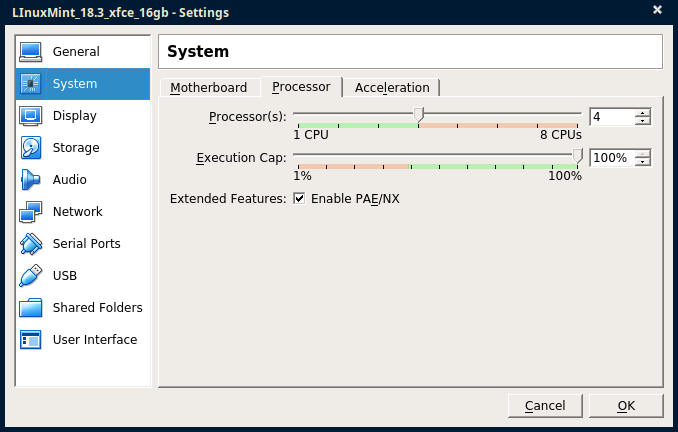
Within the Processor tab, give it as many ‘processors’ you have in the green range, again: more or less depending on performance. This is an allocation setting, meaning the VM will use up-to the specified value.

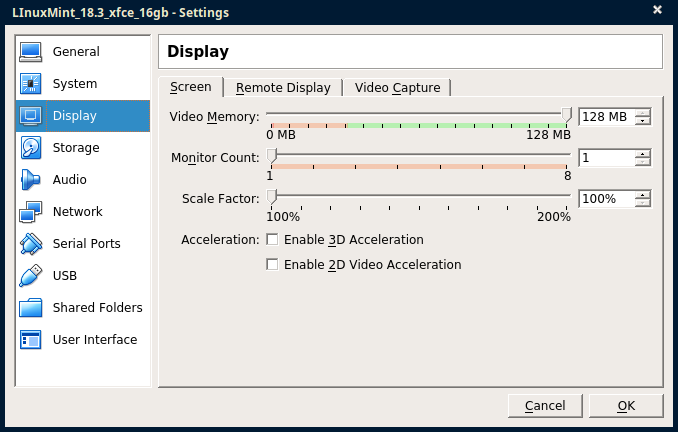
Select “Display” in the left pane, and within the “Screen” tab, tune the Video Memory if needed.

The minimum green value might actually work just fine.

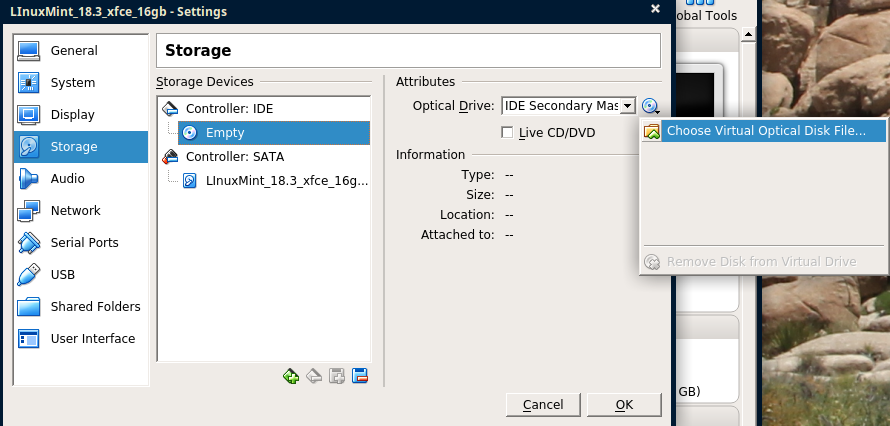
Go to the “Storage” pane selection, select the virtual optical device, then expend the menu to choose a disc image.

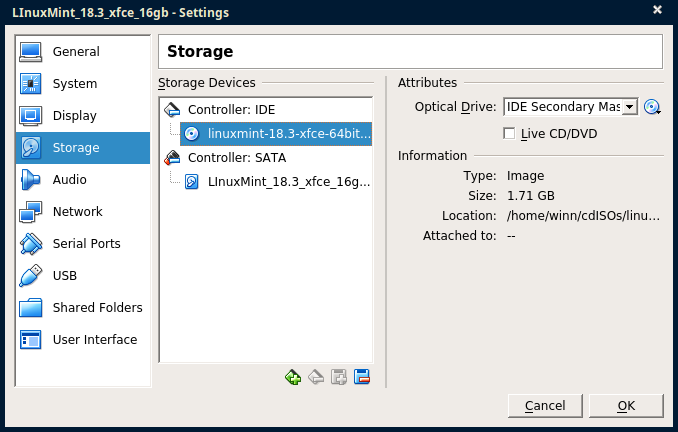
Navigate to the Linux ISO you downloaded earlier. Then Press OK

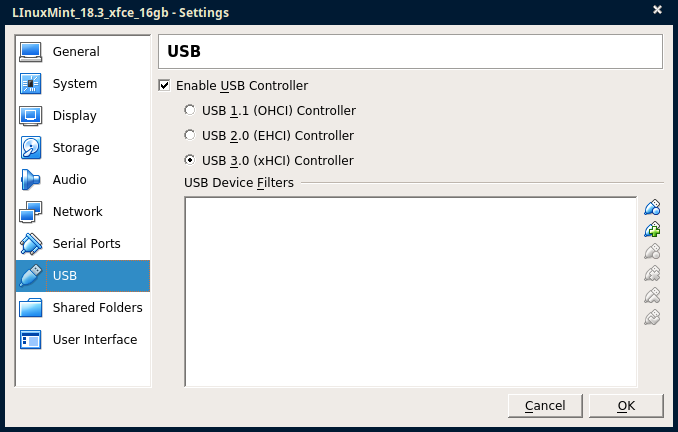
Just showing the USB Controller setting here. I think it defaults to USB 2.0 (EHCI). If your webcam is choppy within the VM, try changing this to USB 3.0, if supported on your computer.

If your host machine is Linux and you can’t assign USB devices to your VM, be sure that your user account is added to the ‘vboxusers’ group.

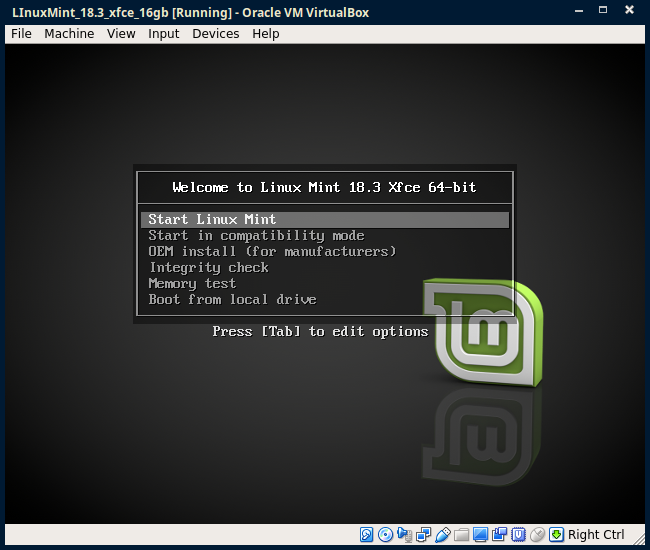
Close out the settings dialog. Press Start to launch the VM. It should boot up with a “BIOS”, then boot from your Linux ISO.

Press Enter on the keyboard to go. You may to click in the VM window first. –To free the keyboard/mouse from the VM if it locks inside the VM, press the right CTRL key on your keyboard.

The LInux Live CD image should complete booting monetarily into a GUI system. Let’s test that your webcam works.

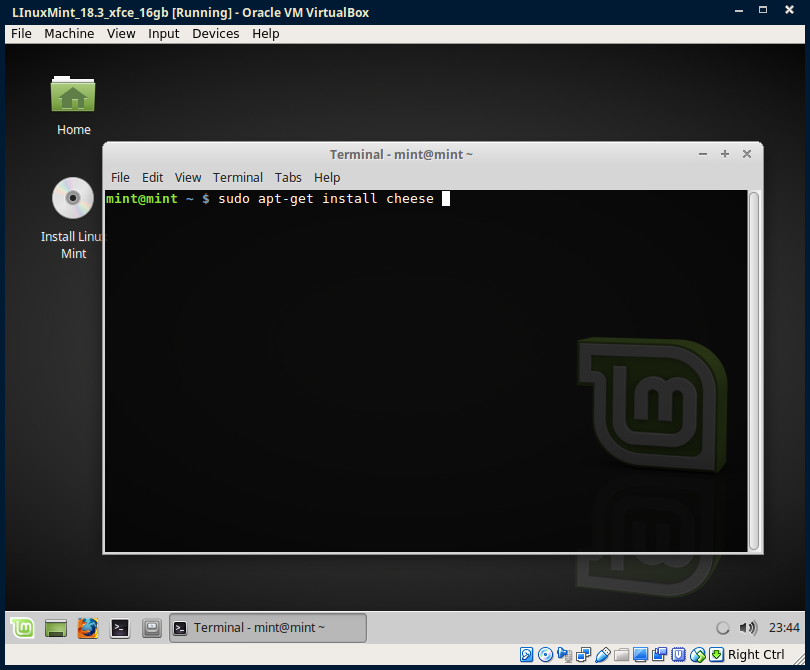
Open a terminal window, and type in

sudo apt-get install cheese

then press enter

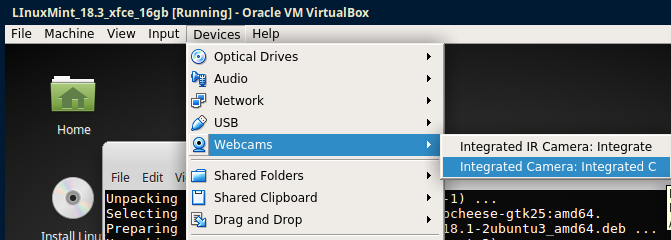
From the VirtualBox menu bar, go to Devices->Webcams and select your webcam to attach to your VM.

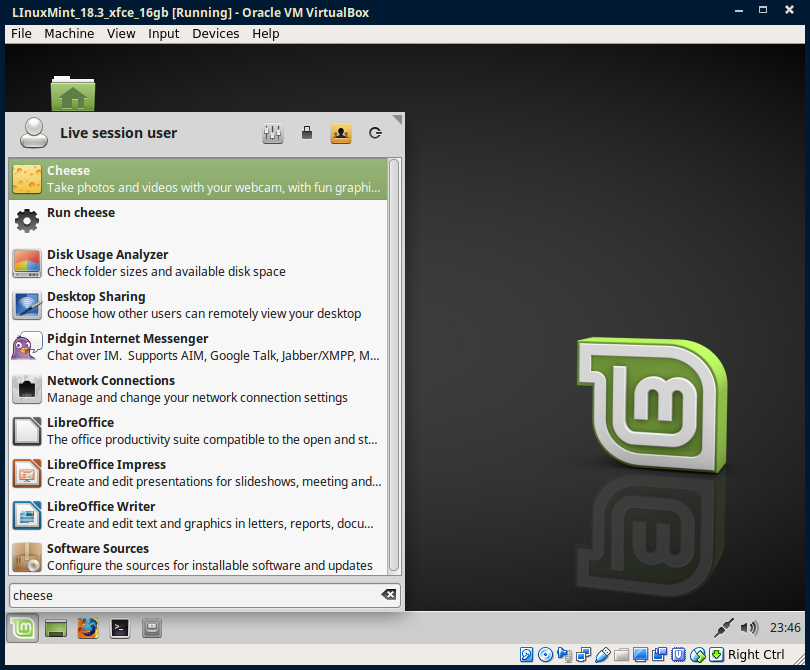
Launch the Cheese from the Applications Menu

Verify that your webcam works. If it’s choppy, shut down the VM and try changing the USB setting from earlier, and try it again.

Close out the Cheese utility.

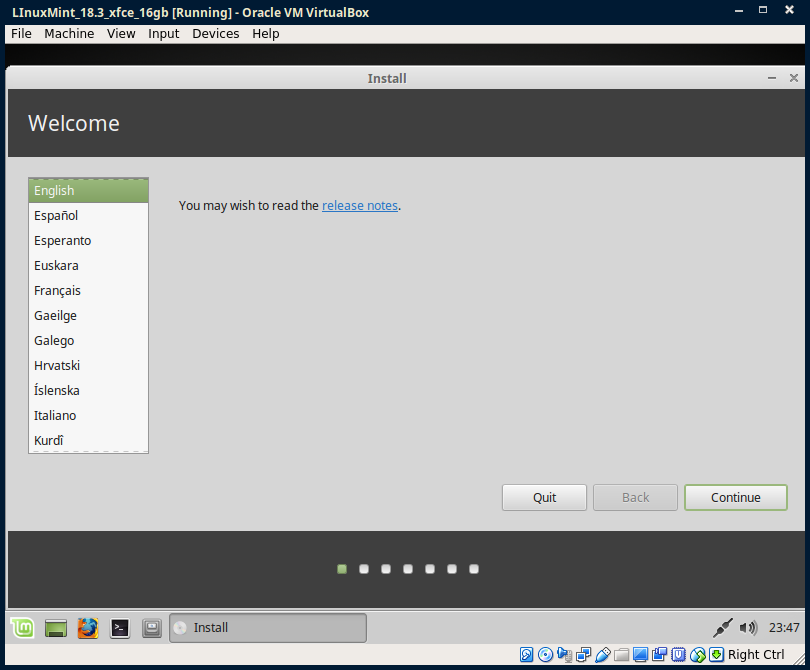
While we could just go conferencing with the live image load, you’ll have to reinstall application with every instance. Instead, let’s go ahead and install the OS to our virtual disk. Couple click on the Install icon on the desktop inside the VM. The Installer will launch.

Select your language

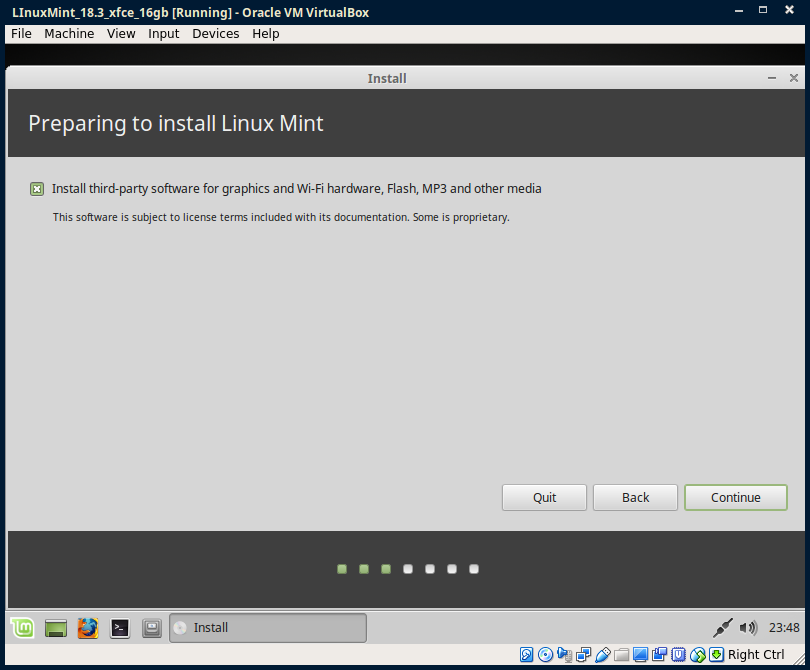
Check the box to install third-party software.

From here, just go with the defaults and press Next/Continue to install the system. We’re only using this VM for conf calls so this is good enough configuration.

When the installer finishes, it’ll prompt you to reboot. Go ahead. Press enter when it says to remove the boot image, and the VM will restart into the installed system.

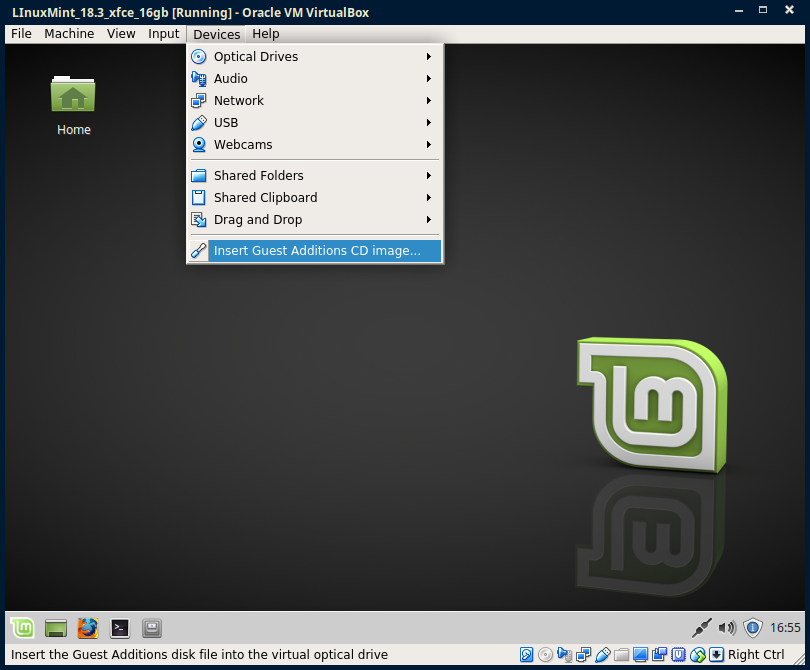
Once rebooted into the installed system, pull down the “Devices” menu from the VirtualBox menu bar and select “Insert Guest Additions CD image…”

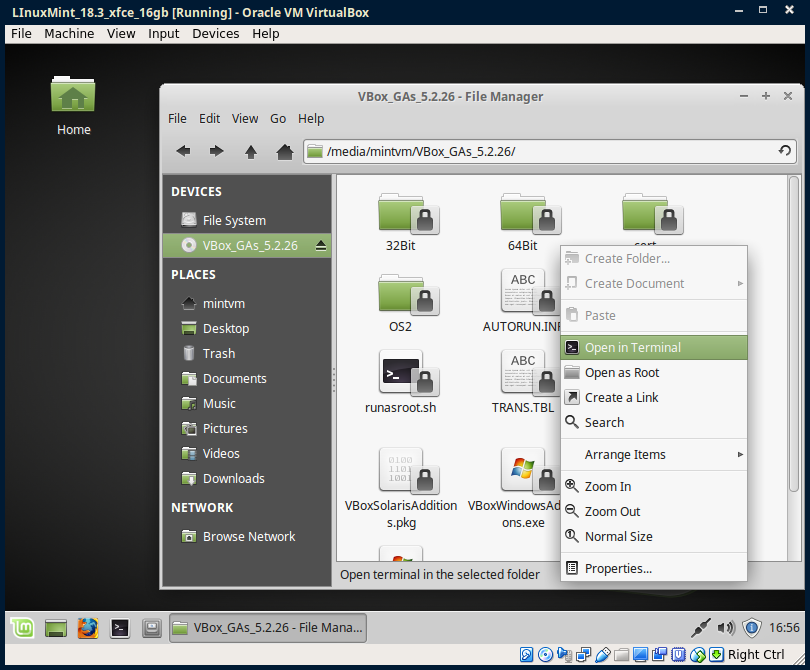
Double-click on the “Home” icon to open the file browser, select the mounted CD image. Right click in the file area and select “Open in Terminal”

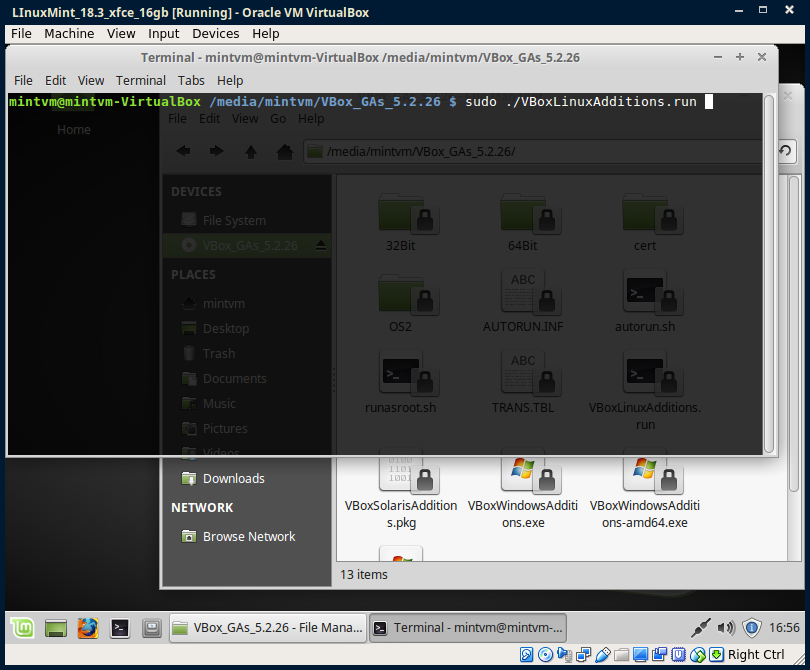
In the terminal, enter

sudo ./VBoxLinuxAdditions.run

Follow the prompts to install the Guest Additions package. When finished, restart the VM.

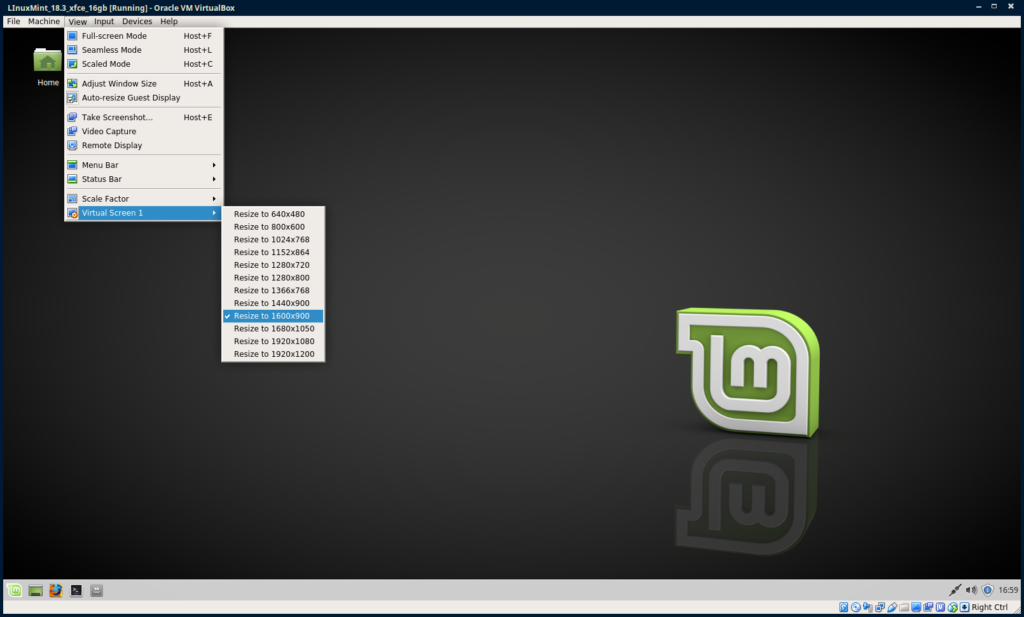
With the VM restarted, you should be able to resize the VM by resizing the running Virtualbox window, and/or setting the screen size from the menu.

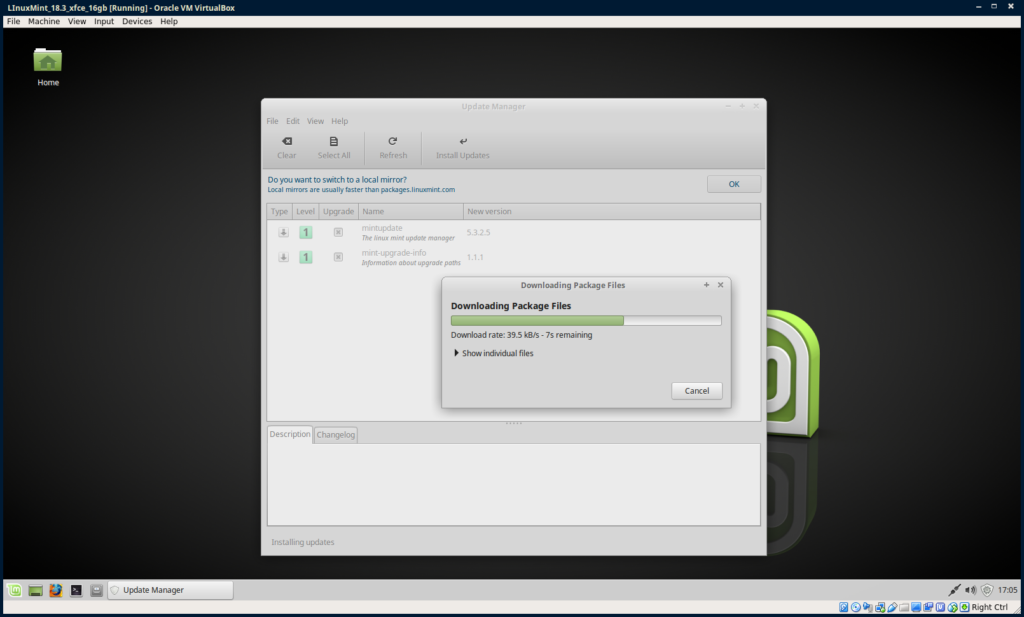
Its generally a good idea to run system updates right after a new install. Double click on the blue (i) shield in the lower right notification area to bring up the update manager. Follow the prompts to update the utility and system packages.

From here, you can certainly use the installed Firefox browser to access web resources, download and install Chrome if you wish, and access conference via web browser.

For WebEx, the limited testing I did with my account indicates positive potential.

For Zoom (yea, yes I know…), well I had some stability issues running within the browser within the VM earlier and ended up first resorting to using browser on the Host side (real) computer. Ultimately I ended up running their desktop client so I could see all videos (gallery view) at the same time…then uninstalled it.

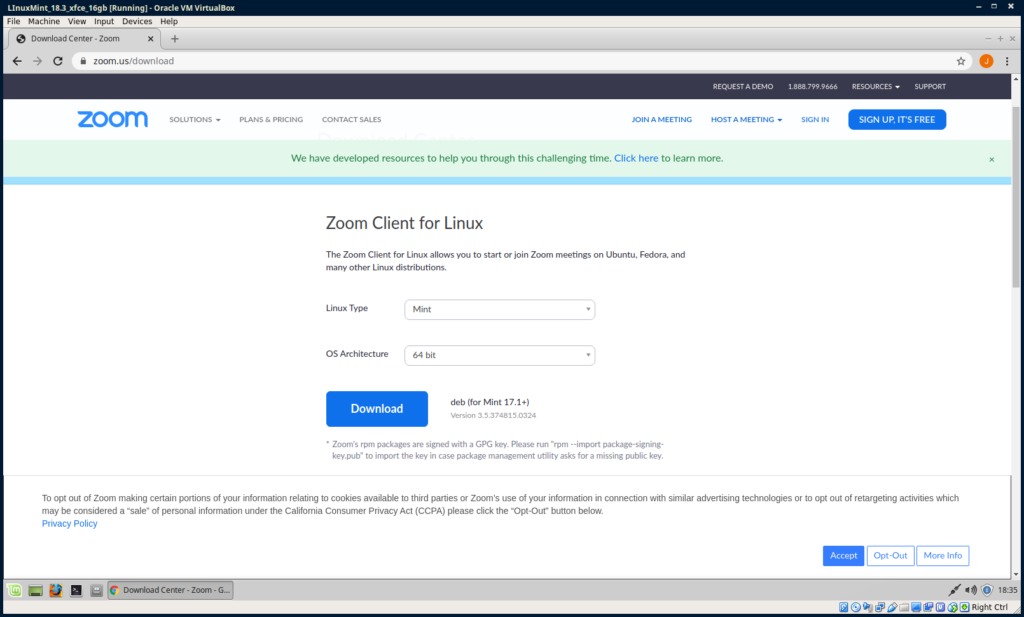
I did install the Zoom application within the VM for next Zoom meeting. You can find the download on their website.

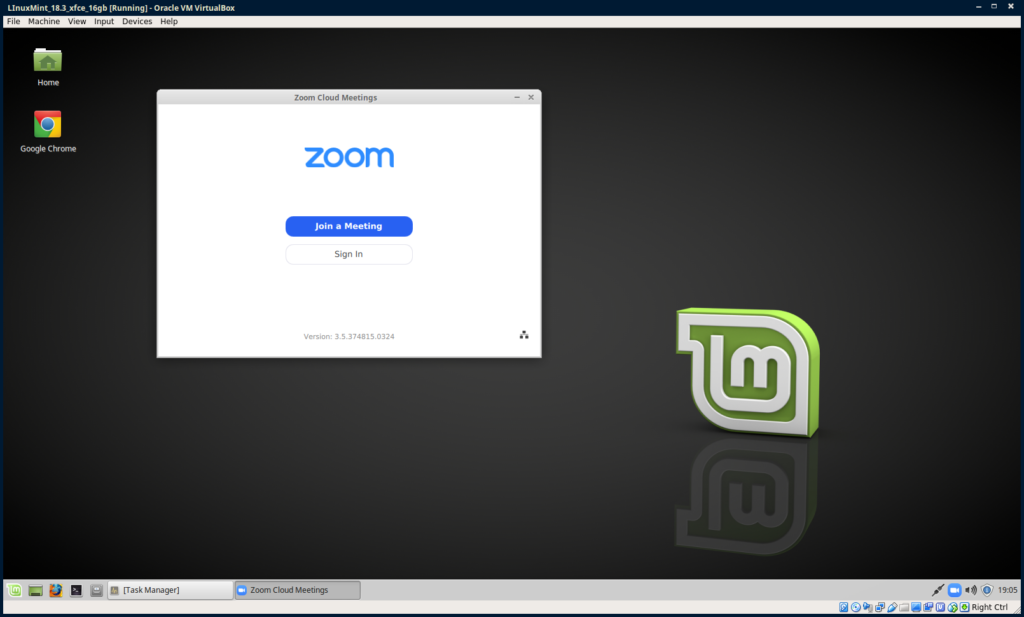
Once installed and launched, you get option to join meeting.

Virtualization is quite nifty for containerizing not only for running dodgy conference applications, but its also good for multi-platform testing and computer consolidation. VirtualBox is certainly not the only player in VMs (see VMware and Parallels) and you have your choices in Host and Guest systems.