Howto: Add a Linux Environment to a Chromebook
The value preposition of a Chromebook is appealing. For not too much cash, you end up with a new, quite solidly built machine that is great for general web browsing and light productivity work.
However, ChromeOS alone is pretty skimpy beyond the browser and watching videos. Adding Linux opens up access to all the software that is readily available via the distribution’s applications repos as well as third party software/tools.
With that, we’ll look into how I added a Linux environment on my $200 econo Chromebook.
Items needed:
- A Chromebook
- (optional) 4GB+ SD card or USB Flash Drive for Recovery Image
- Just a reliable one is fine, doesn’t have to be the fastest.
- Large SD card or USB Flash drive for the Linux install
- We’ll be running a “system” off of this drive, so it’ll be awful nice if you can get a high-performance card/drive.
- Try for at least 32GB to hold the Linux install. –My in-use Linux partition (at time of writing) uses ~13GB to hold the system and a few added programs.
- You can use a single partition just for the Linux install, or get a larger card/drive and split it to use between ChromeOS and Linux.
Before we do anything, back up anything that is stored on the Chromebook itself. Note that the process of enabling Developer Mode on a Chromebook wipes and resets the built-in internal storage.
Speaking of backup, it might be a good idea to create a recovery image for your Chromebook. Do that by installing and launching the Chromebook Recovery Utility and following the instructions.
Then, enable developer mode. As mentioned above, following the steps to enable developer mode will wipe and reset the Chromebook.
Now, every time the Chromebook boots with developer mode enabled, it’ll pop up with an ominous looking warning screen. If you do nothing, after a few seconds it will beep and start normally. You can press CTRL+d to skip that delay. If you press SPACE, it’ll wipe/reset the Chromebook with developer mode off.
–Take that into consideration when deciding where you store files on your Chromebook. Anything sync’d to your Google Drive will get re-sync’d, and anything on SD card or USB drive is untouched. That internal eMMC is ChromeOS’ stomping ground.
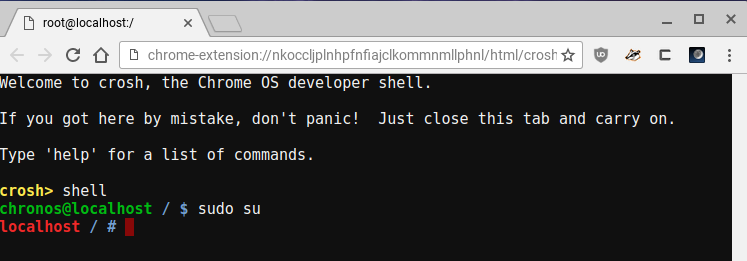
With the Chromebook booted with Developer Mode enabled, press CTRL+ALT+t, to open a crosh window. In the crosh window, type “shell” to get you a shell. Then “sudo su” to elevate yourself to root.
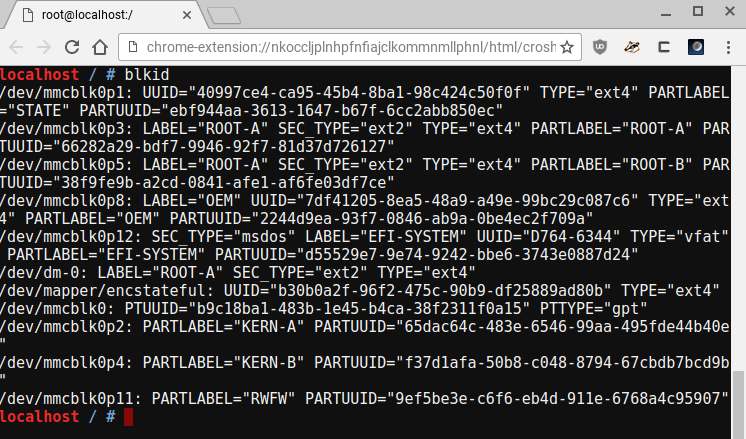
Without your target media inserted (SD card or USB drive you’ll use to install Linux), type in
# blkid
in the shell and press Enter. You’ll get a long list of device partitions. (sample below, yours will have different IDs and such)
Now, Insert your card/drive, wait a few moments, then type “blkid” again and enter again. You’ll notice an extra device added:
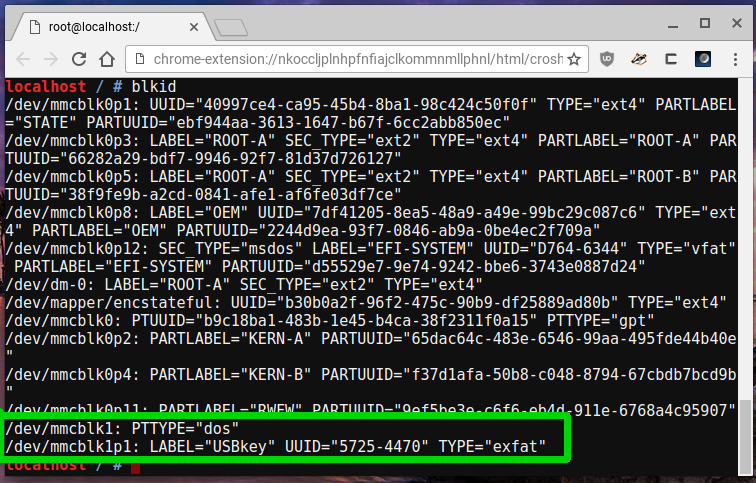
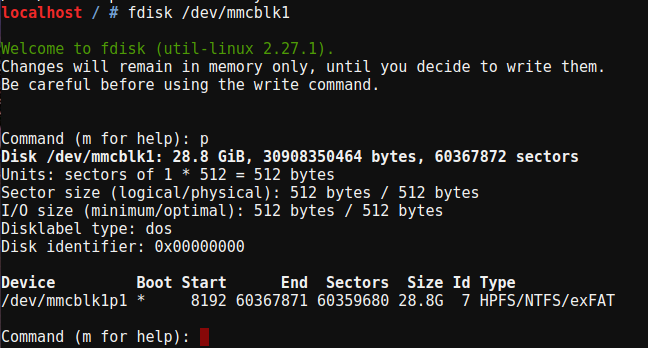
In my case, my microSD card shows up as device /dev/mmcblk1. It originally had 1 partition (/dev/mmcblk1p1). We need to create an ext4 partition. In the shell, enter in
# fdisk /dev/<your_drives_device>

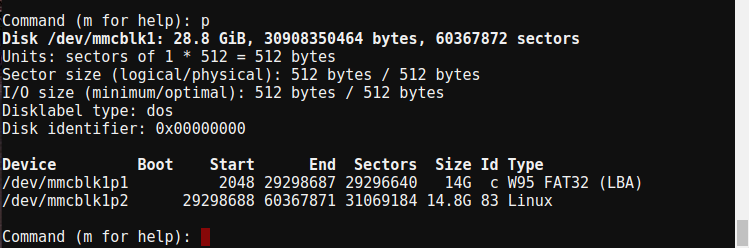
Within the fdisk utility, press ‘p’ to issue the print command to list the present partition table.
Delete the partition by typing in ‘d’ and enter.
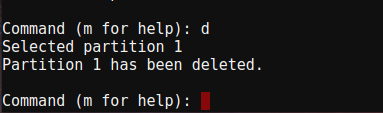
With the original partition out of the way, we can create new partition(s).
Here you’ll need to decide whether to dedicate your card/drive completely for Linux, or split between ChromeOS storage and Linux. In the example below I create 2 partitions, for completeness. If you only want the 1 partition for Linux, you may follow just the instructions for the Linux (ext4) partition.
Additionally, in re-creating the setup for writing this guide, I used a 32GB SD card, that I split evenly. I’d strongly suggest actually using a larger card when creating two partitions so you can dedicate 32GB+ for Linux, or dedicating an entire 32GB card to Linux. –you can swap cards/drives when not using the Linux install.
If you’re going to create a local storage partition for ChromeOS, create that partition first. –a lot of card readers/systems might only detect (at least initially) the first partition of a multi-partition external drive.
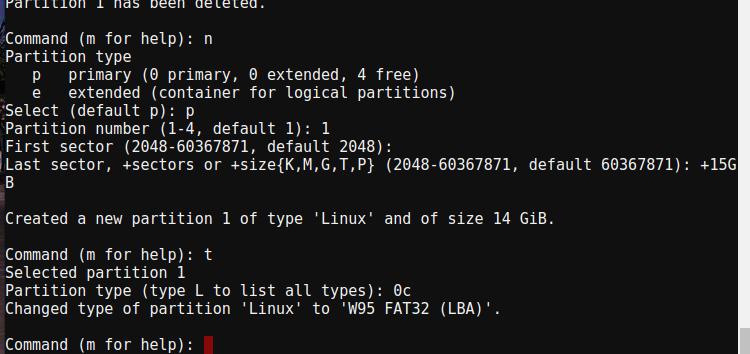
Enter ‘n’ to create NEW partition, then ‘p’ to select PRIMARY partition. Press Enter to select default partition number (1). Press Enter to accept the default starting sector. For the “Last Sector”, enter in your desired size for the partition by “+”<value><units> (e.g. +15GB).
Change this partition type to FAT by entering ‘t’ to change TYPE, then enter ‘0c’ to select “W95 FAT (LBA)”.
Now to create a partition for the Linux install. Enter ‘n’ to create a NEW partition, then enter ‘p’ for PRIMARY. Press Enter to select the default next partition number. Press Enter to select the default starting sector, and Enter again to select the default ending sector.
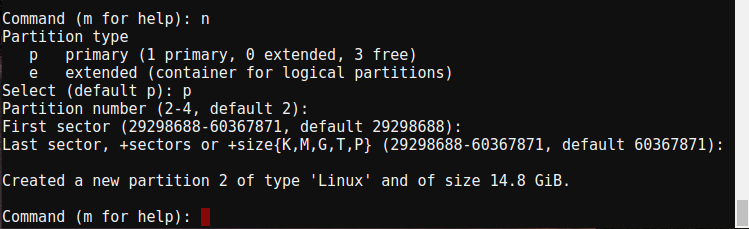
The default type (Linux) is what we want.
Enter ‘p’ to print the resultant proposed partition table
Enter ‘w’ to write the partition table and quit fdisk.
At this point, it might be good to reboot the Chromebook so it’ll unmount and remount the card/drive in the process. (You can spare the 10 seconds it takes to power down/up a Chromebook…right?)
Back to the (root) shell. If you created a “FAT” partition, let’s format it. Enter in
# mkfs.exfat -n <YOUR_LABEL> /dev/<your_drive_device_partition>
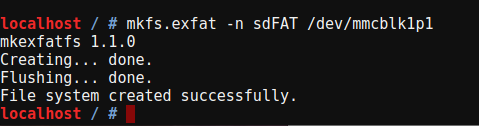
ExFAT has the advantage of supporting large files (FAT32 limits file sizes to 4GB).
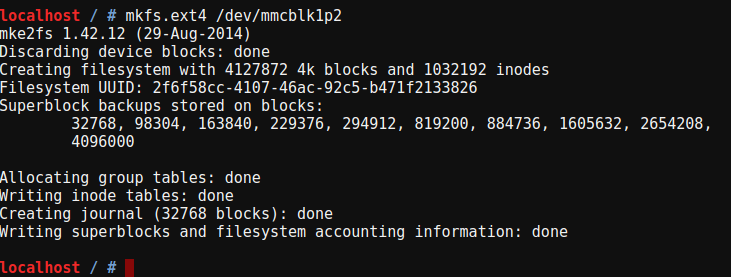
Let’s format the Linux partition to ext4. Enter in:
# mkfs.ext4 /dev/<your_drive_partition>
Set the label of your Linux partition by:
# e2label dev/<your_drive_partition> <your_label>

One more reboot cycle just to make sure everything is squared away wouldn’t hurt.
If you launch the ChromeOS’ “Files” app, you should see the partitions on your inserted SD/USB drive.
With the ext4 partition formatted and ready, let’s install Linux. We will be using Crouton.
First, download the Crouton script from: https://goo.gl/fd3zc , save in default ~/Downloads location.
Open a crosh window (CTRL+ALT+t), and enter “shell”.
Create a sub-directory within your ext4 drive to contain your Linux (chroot):
$ sudo mkdir /media/removable/<your_ext4_drive_label>/chroot_Linux/

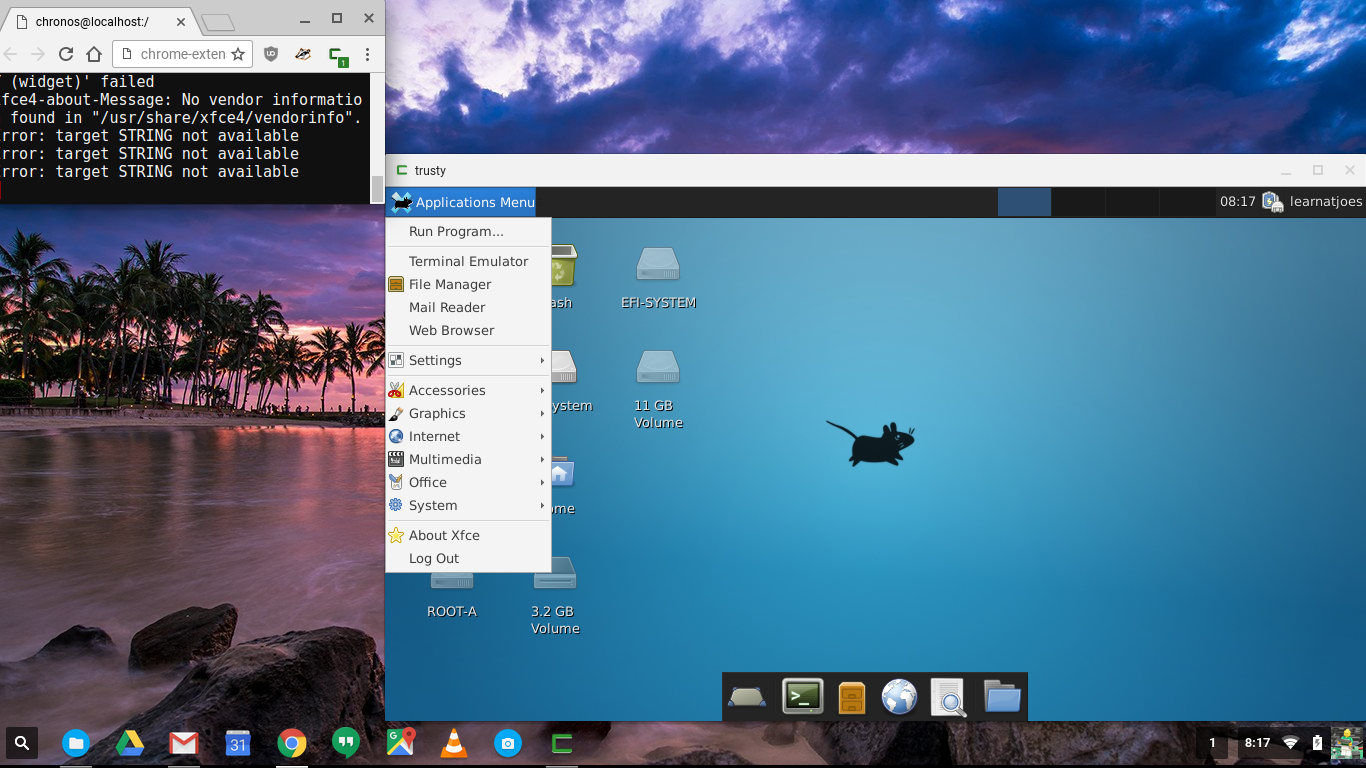
In our example (and my working staging platform), I’m running an Ubuntu Trusty with XFCE desktop. Trusty is the “14.04” LTS version, and is the latest LTS version “recommended without reservation” by Crouton. LTS means it has a long-term support, so it should be a bit more stable. For our uses, a little behind “leading edge” is preferable to “bleeding edge”. XFCE is a lighter weight environment that’s still fairly customizable.
With the crouton script downloaded at ~/Downloads, enter:
$ sudo sh ~/Downloads/crouton -r trusty -p /path/to/your/ext4/partition/chroot_Linux/ -t xiwi,xfce,xorg
where “-r” selects the release (trusty), “-p” sets the install path, and “-t” sets the targets to include.
- xiwi is “X11 In A Window”. This target means the “display” is routed into a ChromeOS window. This makes it easier to toggle between the Linux environment and ChromeOS, as well as letting you “window” the Linux screen.
- xfce is a desktop environment. “gnome” and “kde” are also available among others.
- xorg routes the Linux “display” more directly, which has access to hardware acceleration. Trade off is that it takes over the ChromeOS screen and isn’t as easy to switch back. We’ll include it as a “just in case you ever need it” but the default xiwi mode should be fine for what we’ll work with.

The Crouton Script will take a while (depending on internet connection) to fetch the packages and install the chroot Linux system.
While that’s going, open up another browser tab and install the Crouton Integration Extension from the Chrome Web Store.

Prior to completion, I believe the Crouton script will prompt you to specify a username and password.
When the Crouton script finishes in the shell, you can launch your Linux install by
$ sudo sh /media/removable/<your_ext4_drive_label>/<chroot_dir>/bin/startxfce4
![]()
The shell will start loading the Linux system, handshake with the Crouton-Integration extension, and launch the graphical environment in a full-screen mode. To toggle out of full-screen to windowed, press the Fullscreen button (the top row button above the “5”).
Logging out of the Linux desktop will “shutdown” the Linux system.
Closing Tips:
In the Linux environment, it has been suggested from multiple sources to uninstall the screensaver. To do so, open a terminal (Application Menu->Terminal Emulator), then enter:
$ sudo apt-get remove xscreensaver
type in your Linux user’s password when prompted.
If you want to keep the Chromebook from falling asleep with the lid open, you can try adding the Keep Awake extension to the Chromebook side ChromeOS browser. Toggling the button in the browser to the “sun” will keep the screen on all the time, the “dusk” will try to keep the system awake while letting screen go to sleep, and the “moon” lets default ChromeOS power management take place.
It said that no partition is defined when I tried to delete it. Please help me.
My apologies I haven’t checked the site in a while. I presume you were trying to delete a partition from a SD card? Do you get a partition listed when you print (p) the partition table?