Browsed by
Category: Computers

Would you buy a car with the hood welded shut?

Would you buy a car with the hood welded shut?

This post’s title question is a quote from Red Hat Linux founder Bob Young, emphasizing the benefit of open source software allowing you to inspect and modify your software tools.

This hood was “welded” shut by the clone tool using GIMP.

Let’s take some creative license with the car analogy.

Would you buy a car that has the battery riveted into the chassis? Let’s say doing so frees up the engine bay a little and allows for a larger battery than the standard cubic 24F battery since its custom shaped into a body member cavity. I would wager most folks would balk at this design choice knowing that batteries expire within a few years and would rather be able to replace the battery without also needing to swap out the front quarter body panel.

Would you buy a car whose engine has the water pump, alternator, A/C compressor, and power steering accessories welded into the engine block instead of conventionally bolted on? While we’re at it, turn them all internal facing so they’re driven by a sealed chain. Let’s propose that permanently fusing these accessories into the engine at the factory nets some performance increase and allows the car designers to shave 3 inches from the engine bay and give that space gain into the passenger cabin. I can almost guarantee someone living in Florida, USA during a humid summer season being told their A/C compressor is broken and has to get a whole new engine put in isn’t going to care as much about the few HP or foot-well room bought by the “fully integrated” engine design.

Now, my examples focus more on the hardware serviceability side of things. But it is important nonetheless because such measures preventing you from maintaining your systems within practical reason have encroached gradually over time with little protesting.
Non-user replaceable batteries have proliferated across most contemporary smartphone offerings, thereby placing a hard limit to use life as service life of Li-Ion batteries is just a few years regardless of use duty. Batteries internally glued to the chassis has been a feature on several higher profile laptop models, making repair a potentially dangerous undertaking.

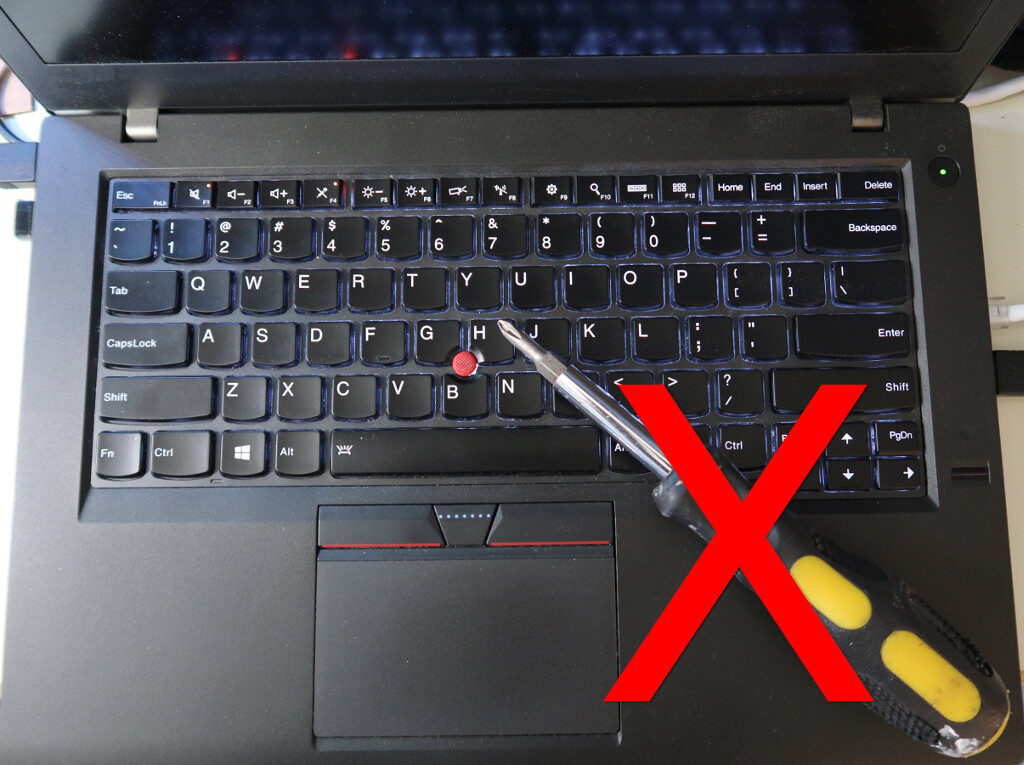
RAM modules soldered onto the motherboard instead of installed into slots isn’t exactly a new invention — I saw it on a couple lower-end Intel-486 based desktop computers back in the mid-1990s. As those models were marketed for institutional use, my guess is it was due to budgetary reasons. Modern laptops that use soldered RAM will claim it helps thin the chassis (whether or not it matters to the target clientele). Granted, for some slim focused ‘s’ notebooks the tradeoff may be warranted, but is odd when an productivity oriented, unashamed thicker ‘T’ notebook uses soldered RAM. Although RAM failures are quite rare these days, a non-replaceable module is yet another unnecessary system failure point.

Back to my fully integrated engine thought from earlier, soldered RAM (and soldered CPU) may be a non-issue for the appropriate target audience who might be more willing to scrap the entire system of either of those parts started acting up. However, bundling the non-volatile data storage within the weld is asking for trouble no matter the end user. Within such a system, if the main board becomes inoperable for whatever reason (bad power rail, water ingress, exposure to leaked battery acid, etc) the user data is not retrievable. Not only that, SSDs themselves are a consumable component with a finite (although usually long) erase/write life and also not immune to controller silicon failures.

Its easy to envision the not so pleasant future where even though you purchase computing hardware, you really only lease them. The ‘just don’t buy it’ doesn’t always cut it because its not just one offending company, nor is it limited to computer hardware.

The debate on right-to-repair may be promising, but it is a complex discussion with many intricacies that can trip up most legislative bodies who are distracted by the lobbying parties of interest while (hopefully) balancing the reach of government.. Impactful and straightforward, yet non-draconian directives may be hard to come by. How do you go about mandating design for serviceability at the legal level with non-ambiguous verbose? Is it “serviceable” if a board or module can be swapped out, or is the requirement satisfied only with schematics, firmware, and access to vendor specific custom chips?

The mitigation options readily available for preventing computing failure fallout includes redundant data backup/recovery measures, and fallback computing systems at the standby.
Get wired for speed

Get wired for speed

Disclaimer: As an Amazon Associate I earn from qualifying purchases

For home and/or office networking, wireless is convenient and as Wi-Fi standards evolved the performance has progressed. Despite technological advancements, wireless networking still lags behind wired gigabit Ethernet in practical use.

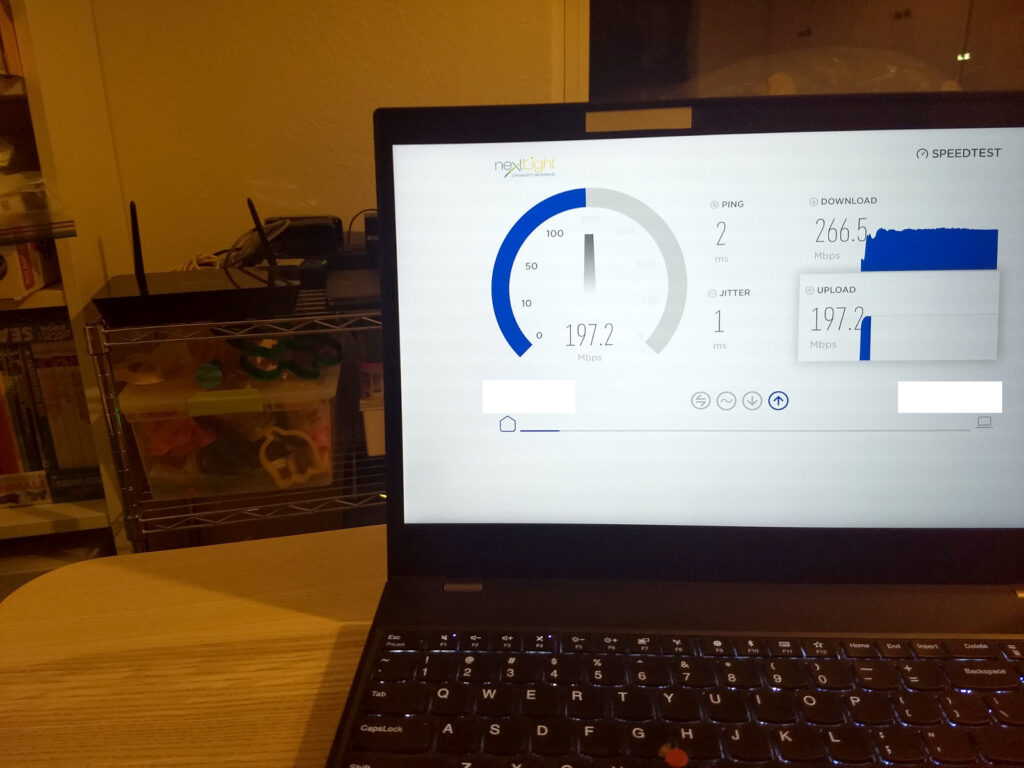
Here’s my mobile battle station just a few feet away from the network router connected via WiFi.

The Dual Band WiFi Router claims “Up to 300 + 867 Mbps” over the AC WiFi, with an asterisk. Real practical in-situ results as shown using WiFi AC equipped laptop.

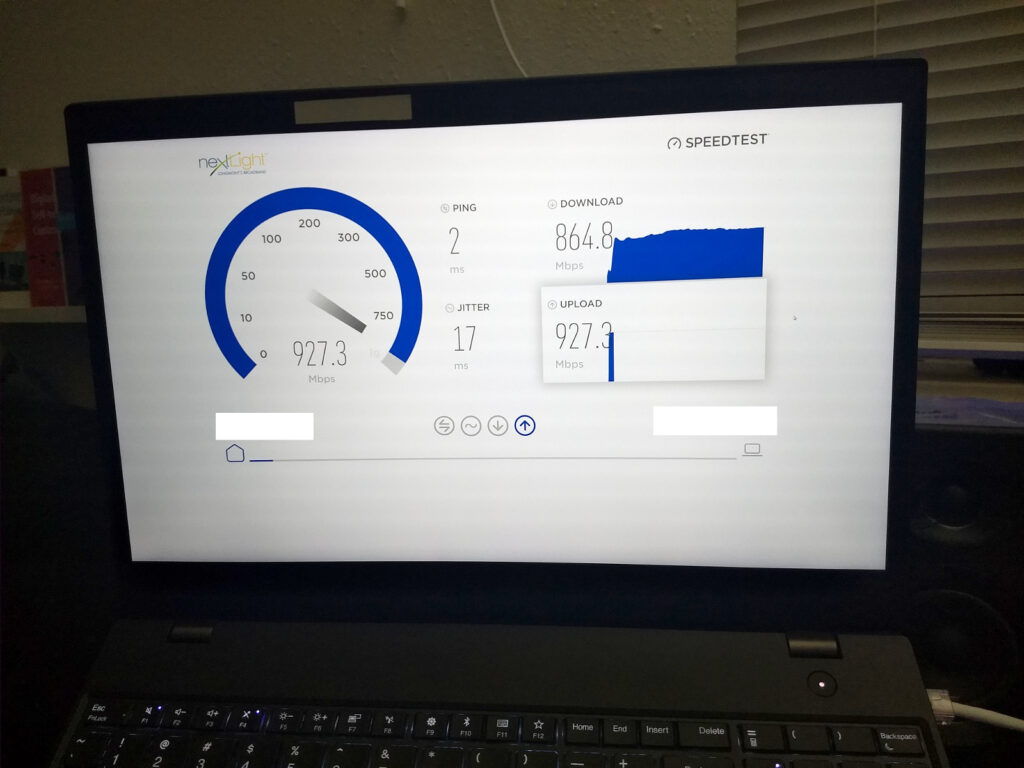
And the same laptop across the house with the same configuration (unplugged power adapter) but attached to Ethernet.

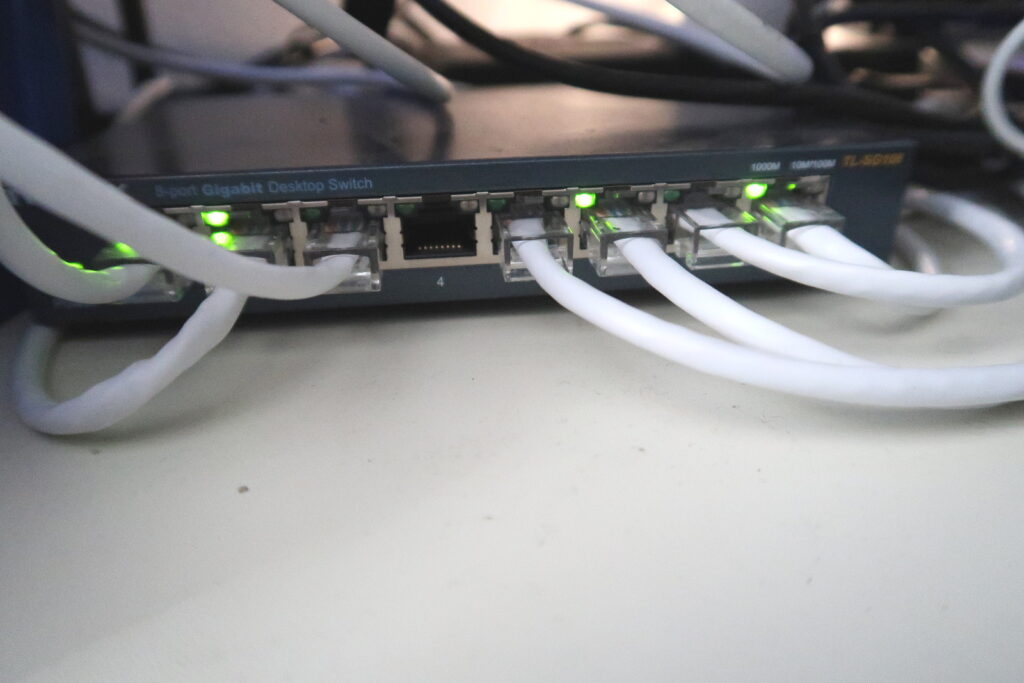
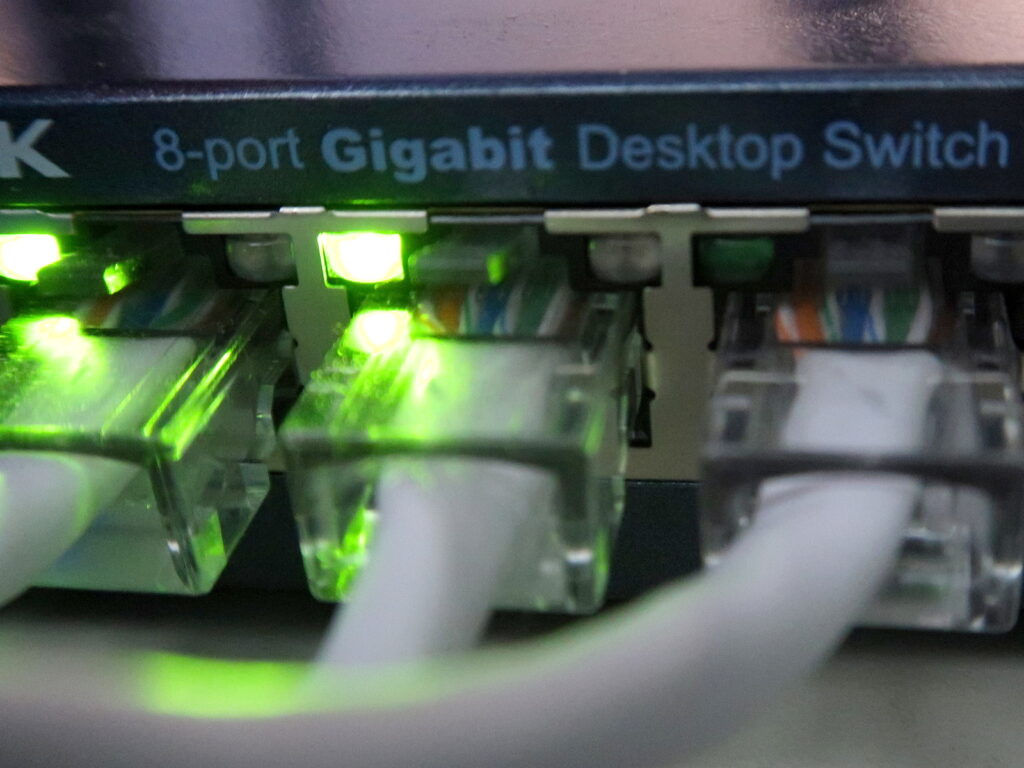
Gigabit adapter on laptop attached to network switch connected to one of the gigabit ports on the router.

The link speed of the Ethernet connection is always 1 Gbps. The WiFi link speed fluctuates for whatever reasons and for me the reported link speed changes significantly when active vs. idle.

Even if your internet service speed is less than gigabit, local network access between computers for file/media shares, automated backup, and the like also benefit from 1000 Mbps transfer capacity. Over SSH/SFTP I usually see around 95-100 MB/s transfer rate copying large files between computers.

Got the need for speed? Good. Here’s an easy quick start:

  1. Obtain a Cat5e cable of desired length.
  2. Attach one end to the one of the gigabit ports on the router
  3. Attach the other end to the gigabit LAN port on your computer. –If your sleek ultra-thin laptop lacks an RJ-45 port, consider a USB-c Ethernet adapter or USB to Ethernet adapter

Do the same for another computer and you should be able to move bits between them much faster than over WiFi.

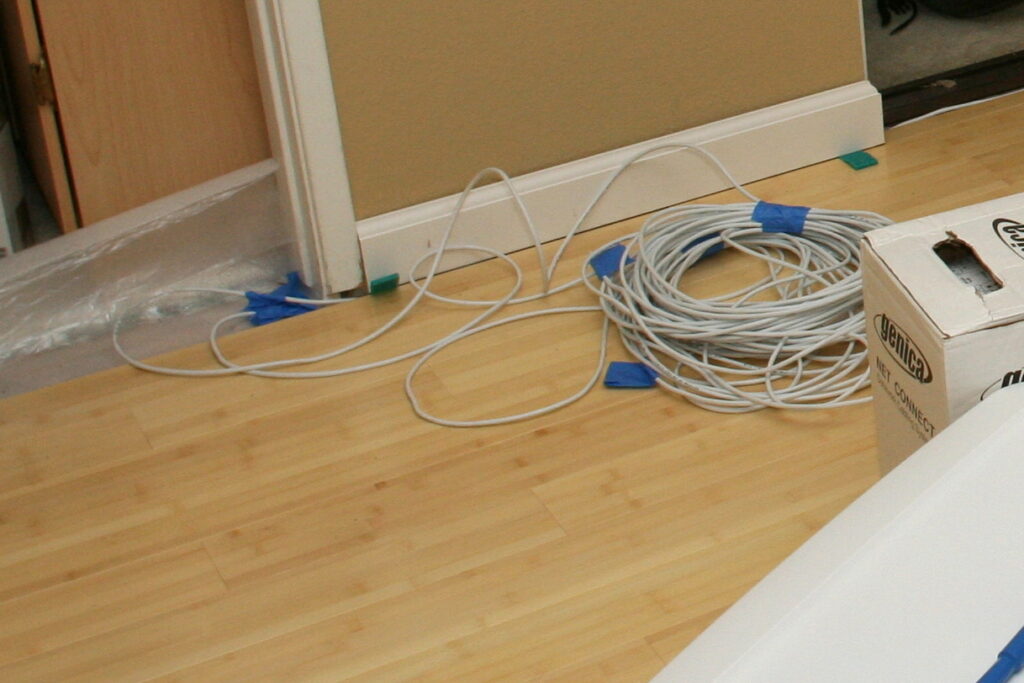
If all your computers are in the same room as your router, or you don’t mind having wires run and taped along the hallway, you’re good here. Read on if you want to possibly put in a clean and tidy installed network run within your home

**Usual disclaimers of your own risk and responsibility apply in regards to working on your own home or with permission from property owner. Only you or your hired contractor can judge the most appropriate work actions for your home configuration.

To run Ethernet throughout your home, you’ll want to start off with a Cat5e Ethernet Cable Kit that for a reasonable price should gets you a bulk supply of Cat5e cable as well as connectors and handy tools.

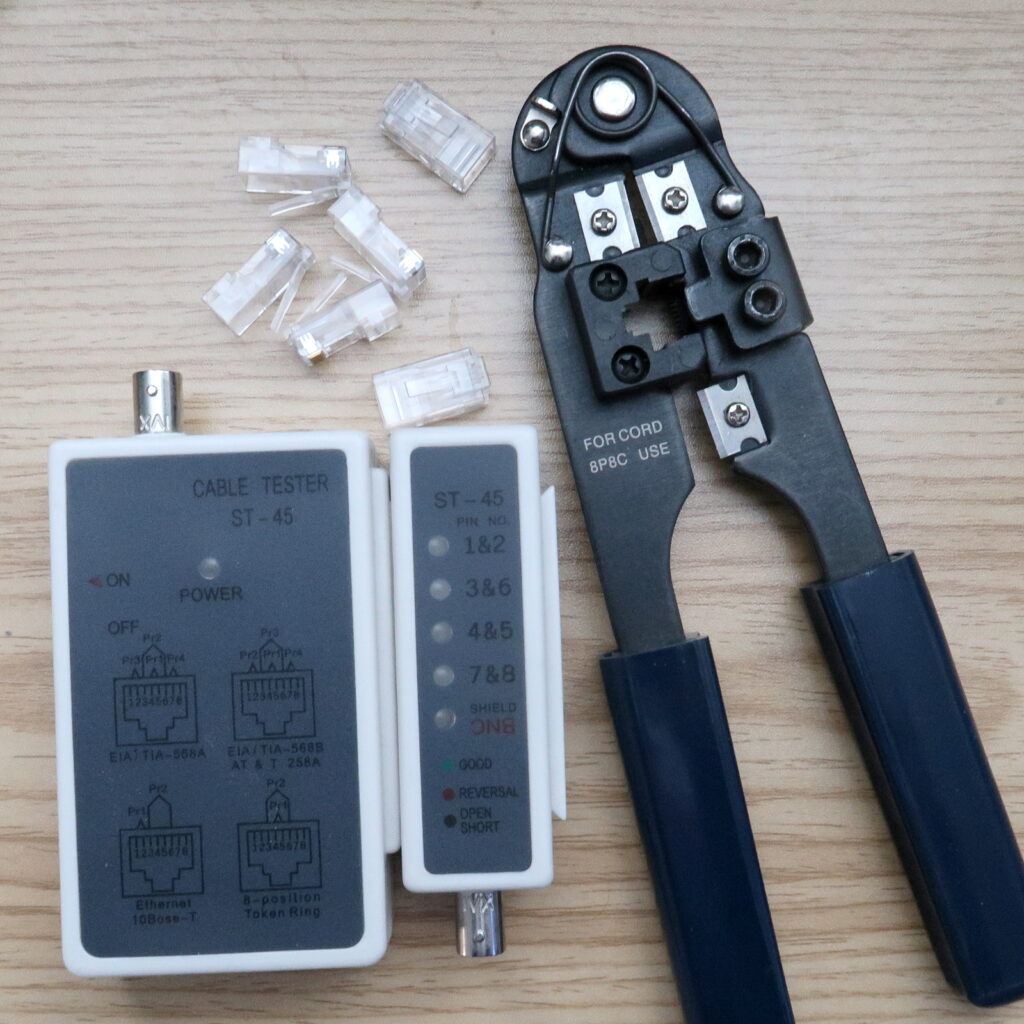
Your kit should include a bag of RJ-45 connectors, a crimping tool, and a cable tester.

You have to know your home to figure how to approach your home wiring runs. I can go over what I’ve done in a few scenarios.

When I lived at home when we still had carpet, an easy and minimally intrusive method was to tuck the Ethernet cable underneath the baseboard behind the carpet edge, and terminating the ends with an RJ-45 Jack and installing it within an RJ-45 surface mount box.

Tuck the cable out of sight. Be cautious of the nail strip holding the carpet in place.

A Fish Tape tool can help continue a cable run underneath a carpeted doorway.

In another home, a wood flooring project was the perfect opportunity to run network cabling within the expansion gap between the flooring and the wall.

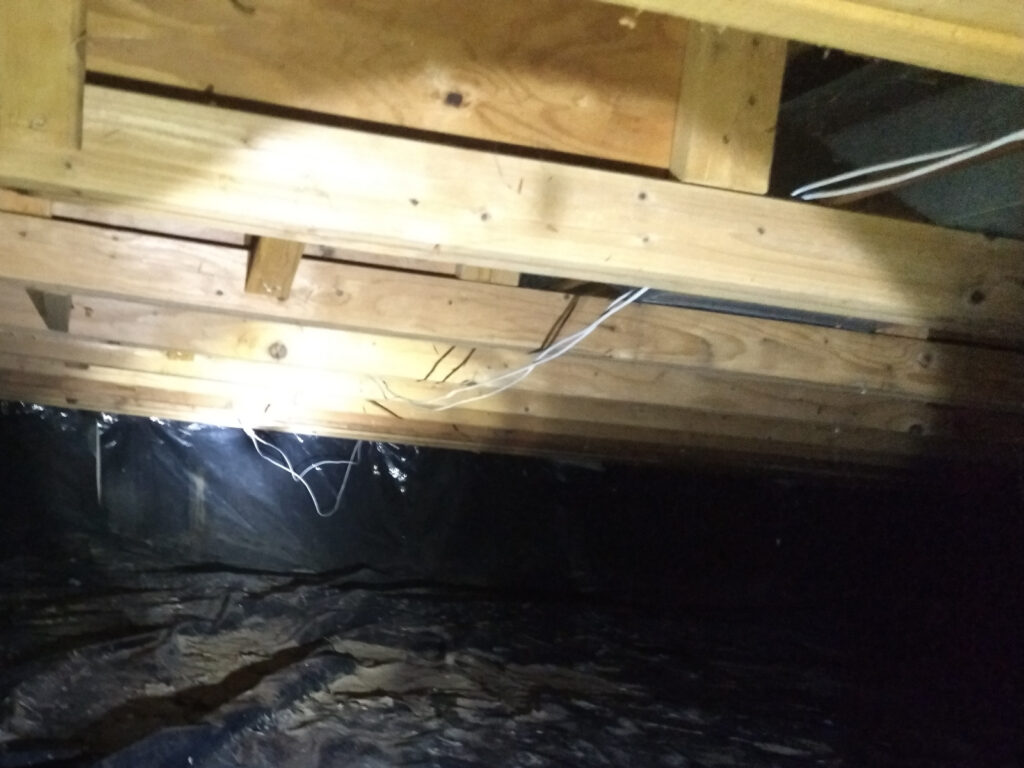
In our present dwelling with wall to wall tile flooring already installed in half of the house, I ran the wiring through the crawl space.

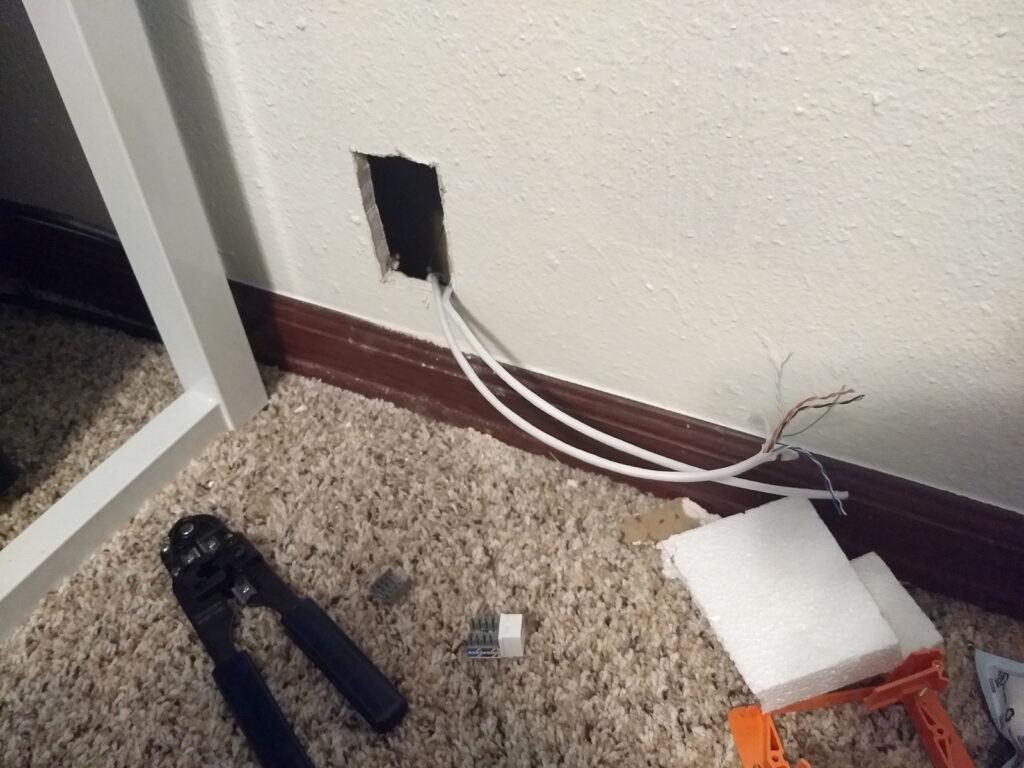
With a stud finder, I was able to plan out the drop locations and cut out some drywall, drill some holes through the sub flooring and pulled the cables through.

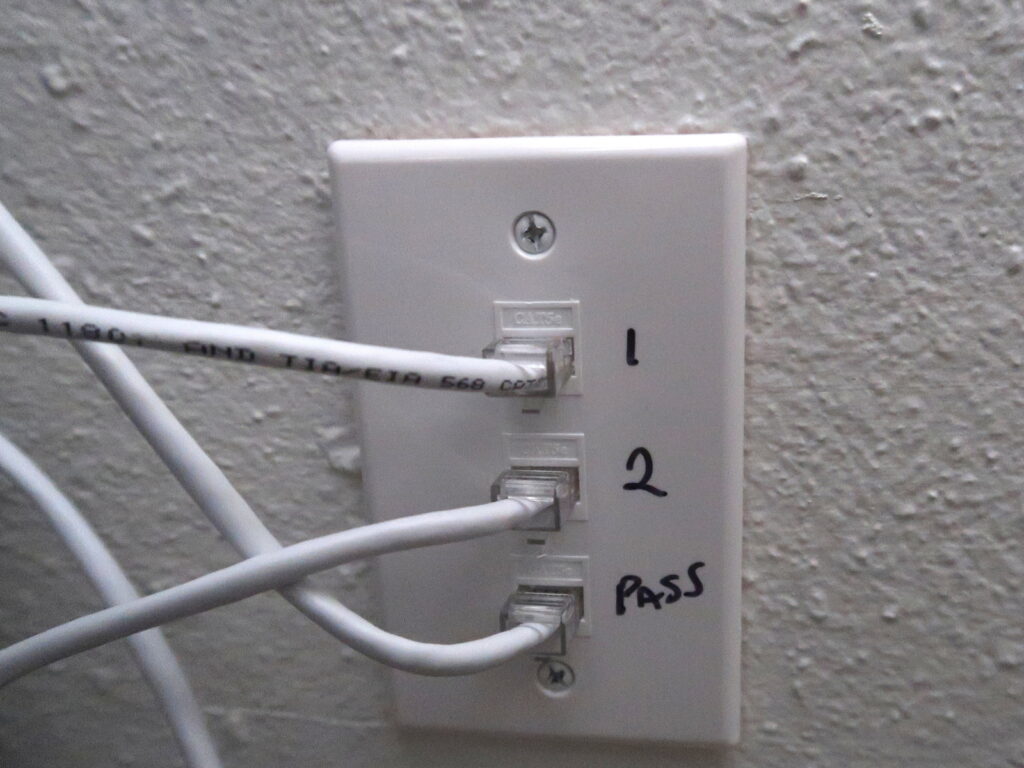
I then finished off the wall with a low voltage mounting bracket, terminate the wires with the RJ-45 jack and installed it within a nice looking wall plate.

With a pair of known good Ethernet cables you can test the end-to-end connection jacks with your kit cable tester, as well as testing the custom length node cables you’ll make with the leftover bulk cable, crimps, and crimp tool.

To fan out your connections from the wall jack or wall mounted box, run a cable from the wall to a network switch, then attach the computers in the room to the switch.

With a small outlay for hardware and time commitment, you can enjoy years of reliable network connectivity within your home/office for work and leisure.

Addendum: If you do plan to cut holes within your non-new build home, be prepared for any surprises. Like, this gent and some of his buddies were hiding behind the wall I cut open.

LPT: If you’re using a computer for work, One is None

LPT: If you’re using a computer for work, One is None

About a year ago I had a conversation with a professional friend about our work arrangements at the time, and what we’d do in terms of bench setup if we each were to do full-time independent consulting and contracting. Almost immediately we unanimously agreed on having two (2) computers.

The rationale is pretty obvious: loss of use of computing tools for design and development is a major risk to revenue when you’re the invoicing party. However, being stuck in the water when your only corporate issued rig gives up isn’t fun either.

I was reminded of that think-storm session earlier this week, right in the middle of a rather intense sprint.

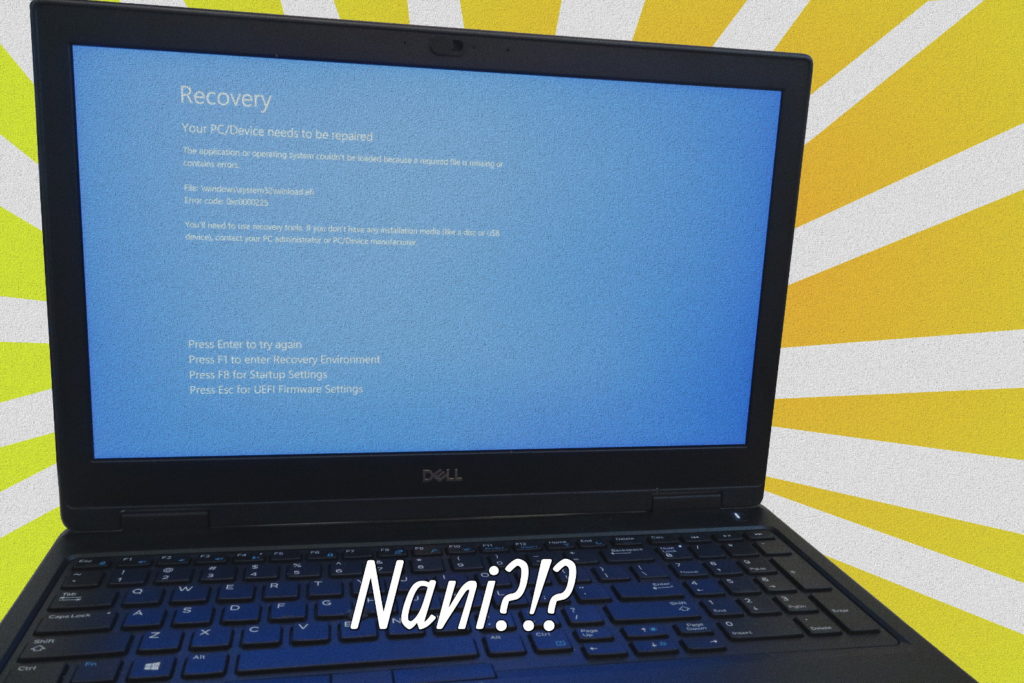
Fortunately, it’s still able to boot after entering Startup Settings and toggling an option. But I have to do it every time now.

Luckily, this halting-on-boot laptop wasn’t the only computer I have for development, because otherwise it would have been very inconvenient in the project support, and a potentially major hassle should major servicing be required during COVID-19 shelter-in-place.

I experienced no loss to productivity because I perform most development with another computer that is my daily driver. On the table next to it is my secondary computer, which while not identically configured, can stand in with the same tool chains should need arise.

Of course, a sound data backup and recovery plan is always necessary and most people (hopefully) have that in mind, especially as some computer models tightly integrate storage modules rendering recovery difficult when the system fails to operate. Redundancy in workstations and other important tools may not often be in the forefront of thought, but is an important consideration. Even if you’re able to pick-up a new computer from the store within the hour, it may take a day or so to load up your software tools to get back to being productive.

It took me a few months to determine the most appropriate redundant systems strategy. At first, I had thought of keeping two mostly identical computers but realized quickly that one of them would most likely collect dust. Two exact setups are also potentially vulnerable to same-time failure if for example, the OS vendor pushes out a faulty automatic update.

I presently settled upon maintaining complementary platforms that are able to either host cross-platform tools natively and/or virtualize operating environments that can be replicated. This way, the computer resources all get utilized on a regular basis and have enough overlap should one fail at an inopportune time.

Is your shop’s email address promoting your brand, or someone else’s?

Is your shop’s email address promoting your brand, or someone else’s?

Online web presence is a requiem for practically every business big and small. Dutifully, that includes establishing a proper web site and appropriate domain name to represent the business.

Oftentimes however, I observe small businesses such as favorite mom & pop dining establishments, or real estate agents, go through the effort of setting up [business_name].com for a web site address, only then to use an email address such as [business_name]@[POPULAR_FREE_EMAIL].com

It certainly works, but definitely could be better. –Potentially worse for professional image if the email goes to an uhm “legacy” internet service provider host. It would be great to setup contact email addresses to use the same domain name. Fortunately, it’s not too hard to accomplish, without having to run your own email server or migrate your existing email accounts.

What you’re going to look for is “Email Forwarding” or “Email Alias.” Once setup, what this will do is the domain will receive any emails addressed to “name@example.com” and forward it to whichever email address destination you’ve set. So even if you use Gmail, Yahoo, Hotmail, or AOL email, you can print your business cards and other promotional materials with an @your_business_name.com email address.

Where to find this setting will depend on your current configuration.

a) If you contracted with a consultant to manage your online presence and have a turnkey service agreement with them, by all means contact and let them know you want an email address at your domain to forward to your usual email address. You can still continue reading below as reference to what your consultant might do.

If you’re managing things partially or fully on your own, then either of these will likely apply:

b) Your domain is setup with a registrar and it points an IP address to a server hosted with another provider – chances are you’re using your registrar’s default DNS server. Somewhere within your host-records configuration there should be an option for Email Forwarding or Alias. If you’re unsure, look through the registrar’s support knowledge base or contact the support team

c) If you go into your registrar’s domain setup and you don’t see these DNS options, your domain might be setup to use a non-default nameserver. This may be the case if you’re using the same company for domain and hosting where they have you setup with their “web hosting nameserver”. If the web hosting side presented you a cPanel control panel, you might find the email configuration there.

So far, you can receive emails addressed at your forwarding alias.

No matter what, if you’re writing emails from your Gmail/Yahoo/et.al account, the email headers will show that it is originating from Gmail/Yahoo/et. al.

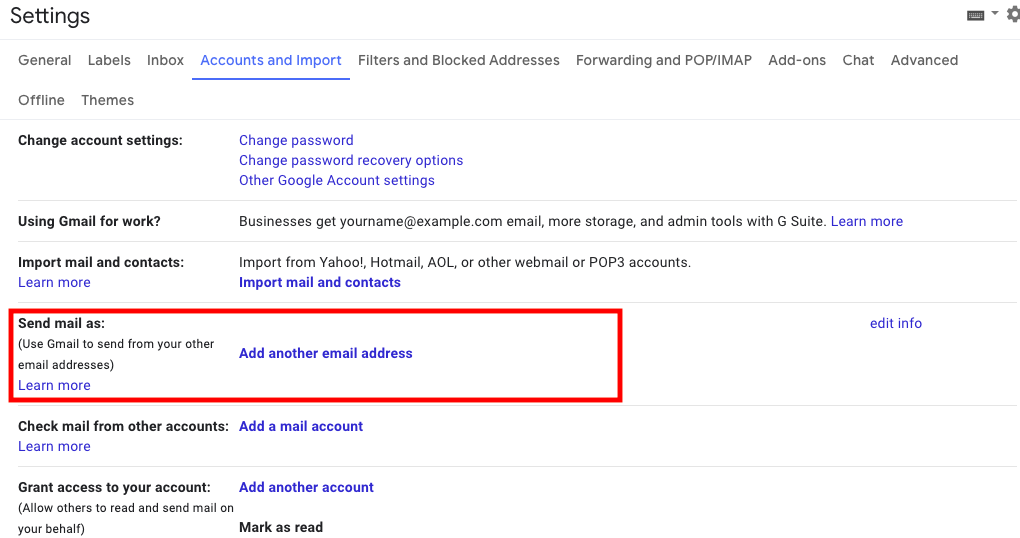
However, you can set your email account’s “Reply-To” address to your domain forwarding email address. This way, when someone replies to an email, your ‘name@your_business_name.com address will be in the “To:” field. In Gmail, its under Settings->Accounts and Import.

Now, when you go to draft emails, you should get a drop-down option in the “From:” field.


Send some test emails between yourself, maybe get a friend to test it out for you as well to make sure all works as expected. Now you can have consistency with your web address and email address.

Getting Python to Play the Piano

Getting Python to Play the Piano

Disclaimer: As an Amazon Associate I earn from qualifying purchases

During a recent visit to Costco, the kids and I walked past the KAWAI pianos on roadshow display. We were admiring one of the models that was fully acoustic on the instrument side, but had some embedded electronics and firmware that automated music playing by mechanically actuating the keys.

The nice sales gentleman made his pitch that it’s value in entertaining without requiring an actual piano player. The model on display was $18,999. Considering that I look like a broke college kid most days and our cart contained other low-cost items, I’m hoping the sales gent was being somewhat joking in a deadpan manner and not expecting us to actually place an order on the spot. Plus, I had earlier remarked to my daughter that the price of the piano was just as much as my daily driver sedan.

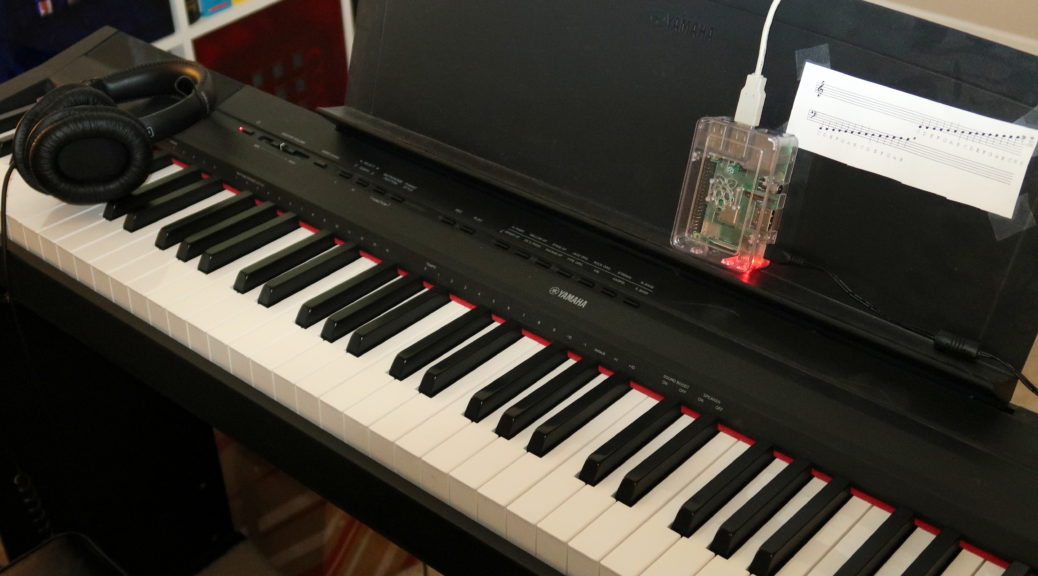
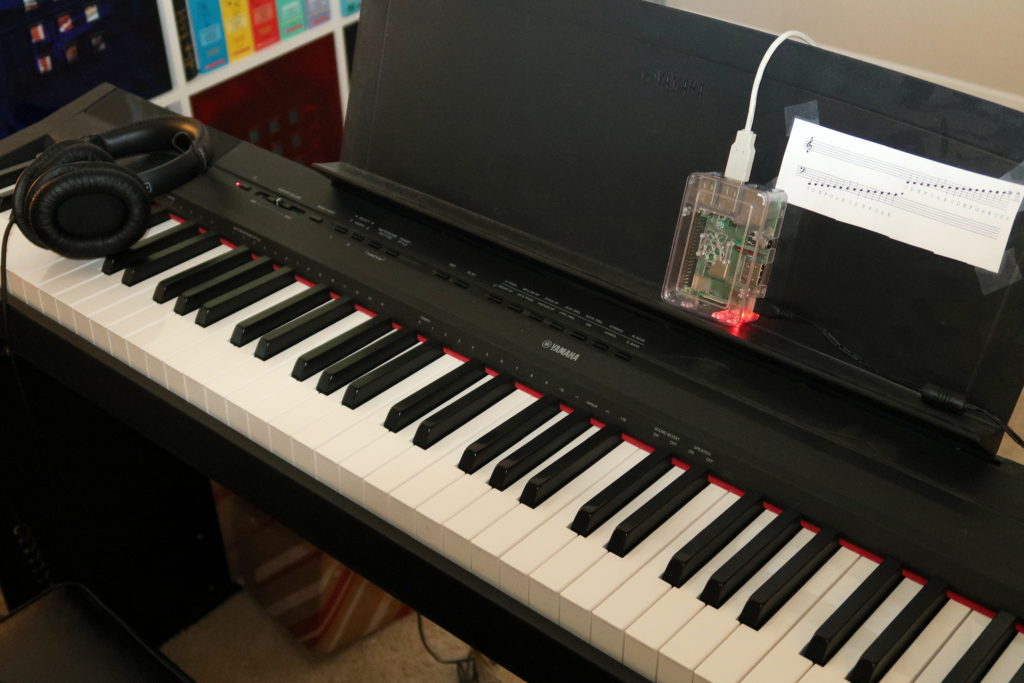
But it got me to recall that our more modest digital piano is equipped with a USB (USB to Host) port. I was able to confirm after quick documentation review that the USB port presents itself as a MIDI device. I found a USB A/B cable and attached it to the nearby Linux laptop. The OS detected it just fine without requiring any additional drivers or manual kernel module loading.

To anyone at Yamaha reading this, THANK YOU for building devices with standard interfaces without requiring proprietary software or connectivity hardware. For that, you rock.

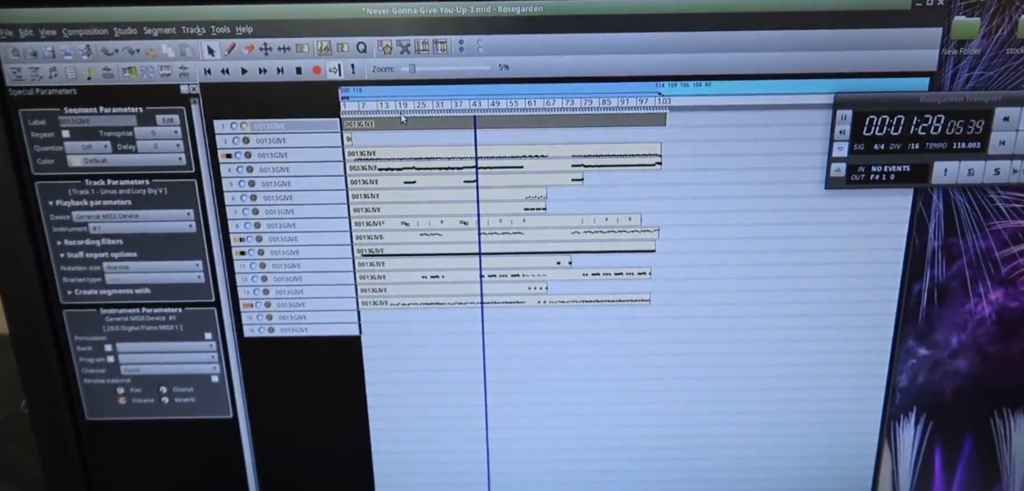
I spent the next few days downloading MIDI files of various popular music arranged by random folks, and piped them to the piano for play-by-instrument using Rosegarden, which is a music composing and editing program. How well a song performs depends on the arrangement, and the nature of the song’s genre contributes as well. (popular 90s era Latin Pop/Dance sound amazing)

For those unfamiliar: compared to a sound file (.wav) that contains a pulse-code sequence to represent a audio signal, a MIDI file is essentially a sequence of instructions to command an instrument device (physical, or software emulation) to play notes/sounds with prescribed voice and other parameters as well as set instrument controls.

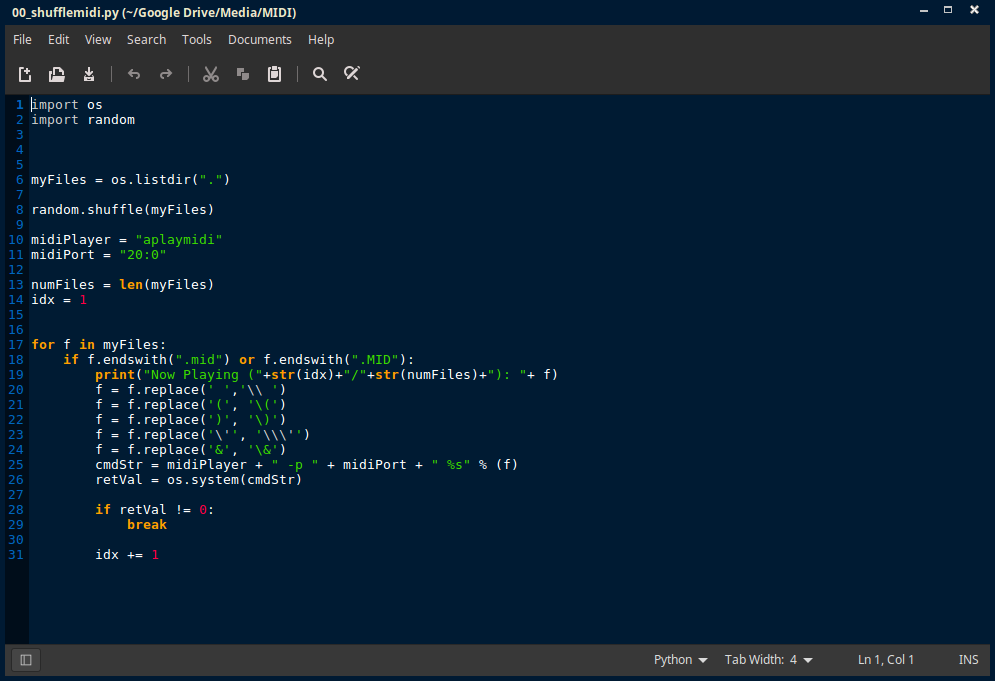
But in my quest for semi-unattended playback, I wanted something that I could just load a playlist and go. I didn’t find such a program, so I went ahead and drafted up a Python script.

The relatively basic script scans the directory for MIDI files into an array, randomly sorts the array, and then calls ‘aplaymidi’ program that comes with Linux with the MIDI port number and file name to play. It features some filename character escaping and very little robust error case handling. But it does catch CTRL+C to gracefully (as best it can) quit out of the loop.

The script runs on the laptop as expected. But because it’s Linux + Python, it also runs on a Raspberry Pi.

I had a moment of pause wondering if the plug-and-play would indeed work on the Pi since it’s ARM based vs. x86/x64, but it was for not because it detected just fine.

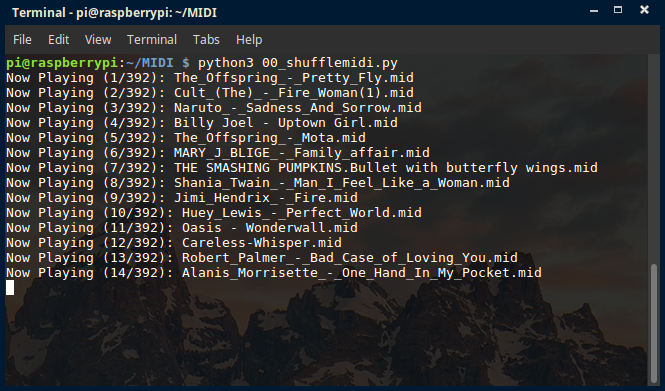
Here’s the script running on the Pi, invoked from an SSH terminal shell, since I’m running the pi headless (no monitor or keyboard/mouse attached)

It is truly amazing that I can attach a $35 computer and “upgrade” a lower cost instrument with feature(s) found on models costing hundreds or thousands more!

With the GPIO pins on the RPi, I could certainly attach some hardware buttons and handle events for Play/Stop, FF, and Prev. –For another time, or I’ll leave it as an exercise for you the reader.

Addendum: As with most software projects, the same objective could have been accomplished with other solutions (in this case: shell script, perl, etc) but 1) I wanted to expand my python-fu, and 2) Python is the cool language/tool of this writing. Not that I’d universally suggest everyone to chase every fad and trend, it does help to keep up with available options and general marketshare. If given the chance to work on a lower risk project, I do encourage you to try out and evaluate new or new-to-you tools to solve the problem rather than always using your go-to choices.

A robot car kit to satisfy curiosity

A robot car kit to satisfy curiosity

Disclaimer: As an Amazon Associate I earn from qualifying purchases.

Ever since our little ones got hooked on watching NASA/JPL Curiosity landing videos, they’ve developed a strong interest in robotics (yay!!!).

And as luck would have it, our kids would often ask me (the dad) to “build a robot”.  When the kids were younger, building models with LEGO would suffice.  But it soon became apparent they wanted a “real” machine.  I had given a design try a while back.  I spent a few evenings looking up design ideas, drafting up sketches of mechanical pieces that we could fab from hobby plywood… but never got further from the computer screen.

Historically, I haven’t been a huge fan of turnkey kits.  I had saw them to be either of low quality or charged a significant premium for the convenience of all pre-selected parts in one box.

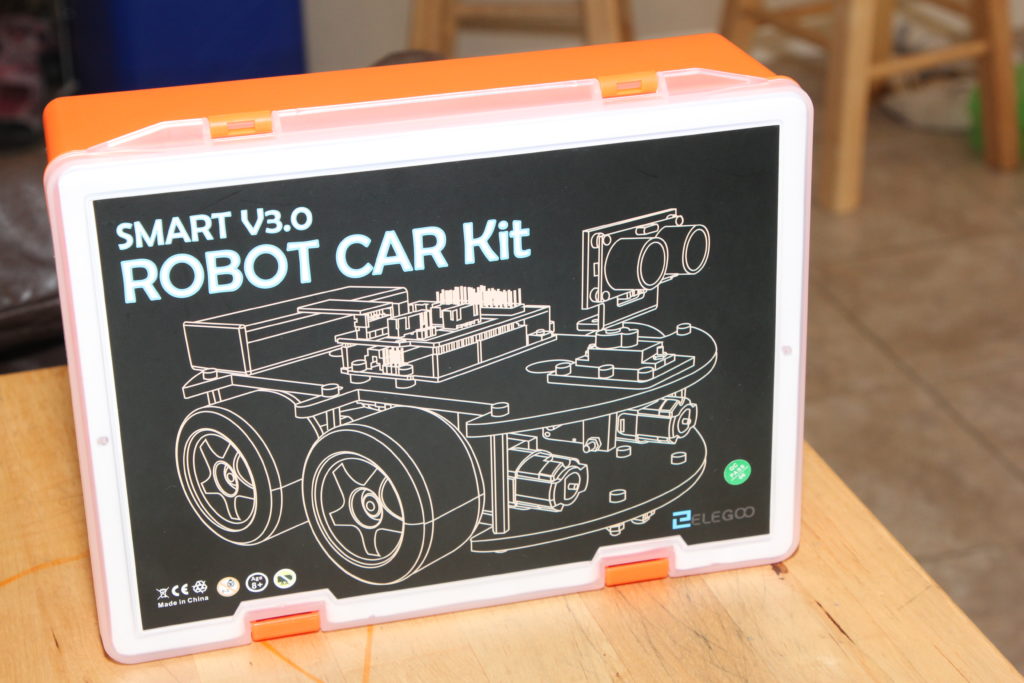
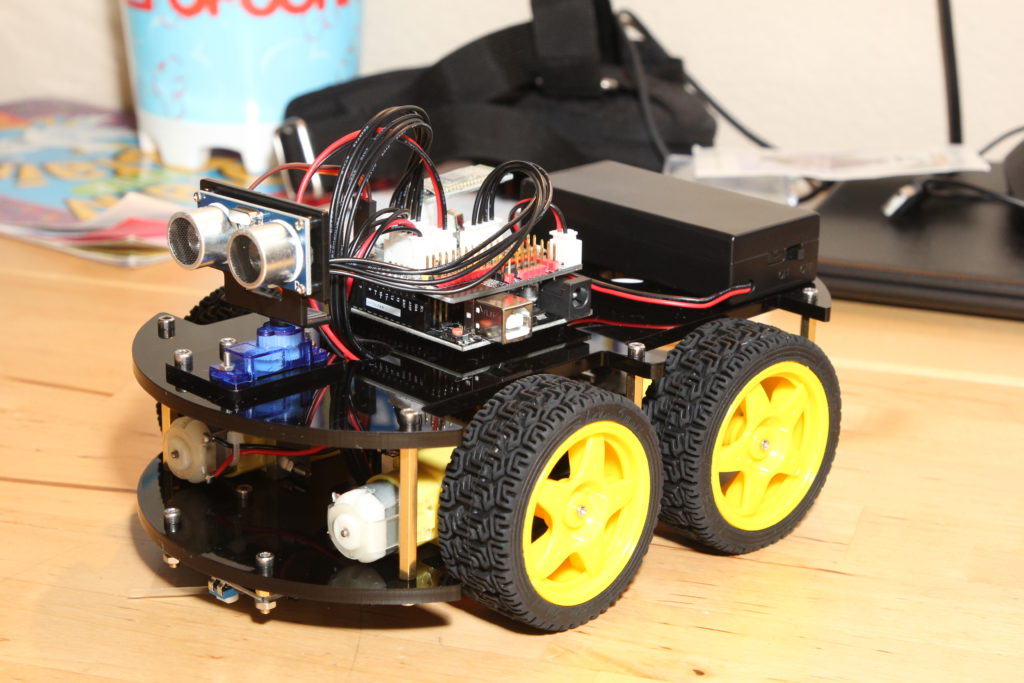
But then I found this Elegoo Smart Robot Car Kit.

The kit comes with an Arduino control board, an I/O board, a ultrasonic module, a bluetooth module, line following module, motors, wheels, chassis, and all hardware needed for assembling the kit.

My Value Justification:

At time of writing, this off-the-shelf kit will get to your door at a reasonable packaged price.  You can easily spend half that cost just on machining the chassis plates yourself.  You could alternatively individually purchase a standard Arduino board, and other modules, but you’d still have to figure how to mechanically and electrically link them together.  The board designs may be open source and be a good EDA design exercise, but good luck getting the PCBs made for < $100 before you even add in the parts BOM.

The Build:

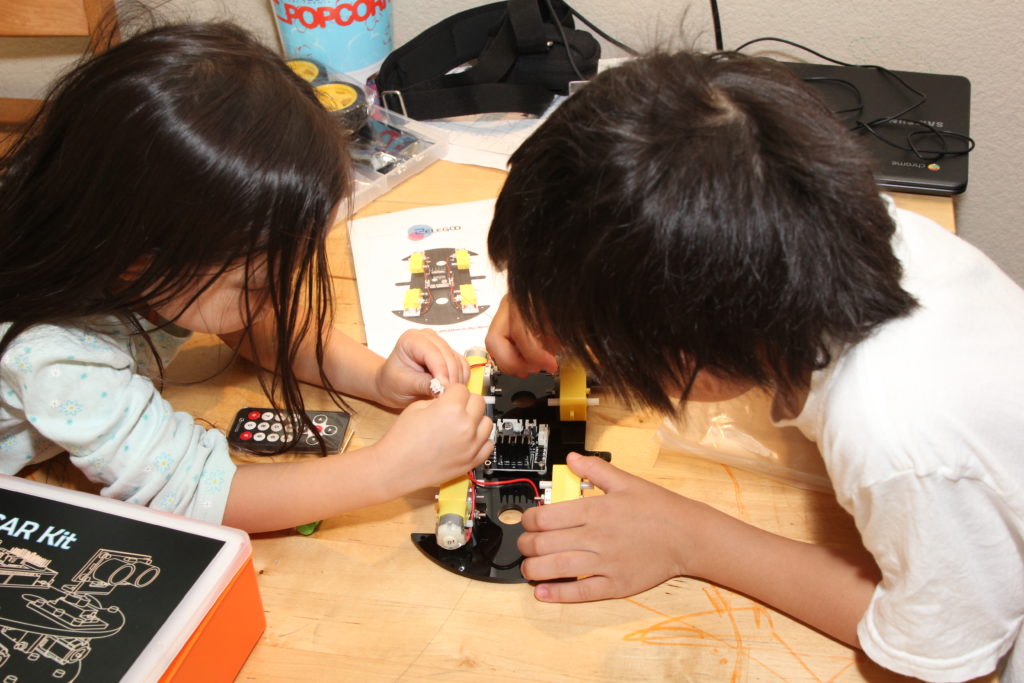
It went really well.  The kit came with clear illustrated instructions which our 2nd grader and Kindergartner were able to follow along with just a little hand dexterity help from me for some of the tighter screw assemblies and finer connections.

Parts quality is good.  The pieces appear to be machined well.  The components and hardware aligned up very easily with little fuss.

The kids now have a robot:

The kit includes demo and learning firmware projects to load via the Arduino IDE.  We are able to upload the “auto_go” firmware to the kit and watch the car drive around on the floor.

I’m quite impressed at this kit, what it comes with, and what it enables.  The car robot as-kitted presents many learning applications, but it also lends itself to expansion and modding.

In terms of inspiring learning pursuits, robotics engages the young hungry minds in mechanical engineering, electronics design, embedded firmware development, and applications development.

Introducing Computer Science with micro:bIt

Introducing Computer Science with micro:bIt

Disclaimer: As an Amazon Associate I earn from qualifying purchases

Throughout the school year we introduce computer science concepts as appropriate for age and skill level.  Towards the end of last school year we started using the micro:bit platform as a fun learning tool with much success and plan to continue in the following weeks.

The micro:bit is a plug-and-go easy to use introductory electronics and programming platform with a 5×5 LED “display” matrix, a couple buttons, and a 3-axis accelerometer.

The kit comes with a battery pack and a short micro-USB cable for power/programming.  The longer hi-visibility red cable that I used is this one: https://amzn.to/2KQv6Wm

The programming environment is web based, so any computer with a modern browser and an available USB port should work.  Our kids were able to do the labs with our relatively low-power, long battery life Chromebook

Time-Lapse capture with webcam and Linux scripting.

Time-Lapse capture with webcam and Linux scripting.

Disclaimer: As an Amazon Associate I earn from qualifying purchases.

Time-lapse photography is a concept of taking snapshots at a particular interval over time to record events in a low resource manner, compared to capturing a video stream.  Here, we discuss how to use a relatively inexpensive web camera and a computer to build a low-budget time-lapse platform.

Action Summary

Video capture of a video capture

Pretty much any relatively modern PC with decent storage and functional USB 2.0 ports should suffice.  I had an old big-box special on hand.

Logitech webcams tend to plug-and-play easily with Linux distros:

The Logitech C615 is the model featured.  It does 1080p capture, with some nudging.

*Even though I held up an external HDD in the footage, I didn’t get to show setting that up yet and instead relying on internal storage for now.

The “cheese” program is a quick way to test a webcam. (https://help.gnome.org/users/cheese/stable/introduction.html.en).  To install on a Ubuntu/Mint system, use apt-get in a terminal window:

sudo apt-get install cheese

A Compact Flexible Tripod makes for camera positioning in tight corners.

We looked at how to use the fswebcam Command Line utility to capture images via the terminal.  You may either git clone from the project page, or on an Ubuntu/Mint system, enter in a terminal window:

sudo apt-get install fswebcam

It is a bit of trial-and-error figuring the optimal parameters for the fswebcam utility with a camera.

Then we watched how bad I am at live shell scripting, though I freely admit its not my everyday gig and that I make liberal use of internet search the few times I write shell scripts.  Can’t go wrong with an O’Reilly book on Shell Scripting if you want an at arms reach reference to thumb through

Hope you found this useful and informative.  Having a setup like this opens up a lot of other potential applications to build upon.

Disclaimer: from a technical and functional perspective, this post is about using extending usage of commodity hardware using computer scripting.  There are some potential premise security applications for such a setup.  While anyone is welcome to use the information herein, the reader is responsible for determine appropriate for use, deployment, and maintenance of such applications for their security needs.  I/We do not explicitly endorse this type of setup as a part of a security protocol.

Getting Started: A Hi-Value, Low-Budget Laptop Option

Getting Started: A Hi-Value, Low-Budget Laptop Option

Forward: For anything that ever gets posted on this site as a tutorial or project series that calls out materials and/or tools that are not free to follow along on your own, please assess your continued personal interest in the subject matter before committing to a purchase, especially if the considered item is more specialized than general purpose.  Feel free to continue reading the posted materials to gauge interest.

That being said, a computer has many uses by many people.  If you were to buy a computer to check out programming tutorials online, it could just as well be used for many other non-programming tasks.

Now, if you already have a capable computer that you have full ownership or authorization for use/configuration, just use that.  The best things are those that you already have.

So, doesn’t that include everyone?  This is 2016, not 1996.  Well, not quite: Even though affordability has improved vastly over the years, it can still be a stretch to obtain a computer.  But even for those who are more than able to afford a computer, with many personal computing needs being met with smartphones and tablets, a lot of folks can forgo a computer in the home.

That is, until you want do things outside of email, “liking” your friends, and taking selfies with food.

Computers of the desktop and laptop variants are on the market at many price points and feature-sets, and I am to believe folks are more than capable of finding one that best fits their needs.  Any attempt of writing out a buying-guide would be wasted efforts on my part, as many review sites already fill that role.

But I’ll focus on “hi-value, low-cost” for a moment.  If someone who didn’t already own a computer (and access to a work provided machine doesn’t count…), I would suggest spending the least possible if their only driving interest in owning a computer is to follow along posted examples on my site.  But I’d still want to propose a system that’s decently built with reasonable specifications.

Enter: The Chromebook.

Screenshot - 07182016 - 10:14:56 PM

A category of low-cost (except for the Chromebook Pixel) hardware running Google’s Chrome OS, plenty for most casual computer users, many models with battery specs that rival that of big-box door-buster traditional laptop models.  Base system storage is eMMC, and while typically relatively small (16, sometimes 32GB), is usually augmented by an available SD/microSD card slot, thereby presenting a fully solid-state system.  Most Chromebooks are equipped with 2 USB slots, and some form of video output (e.g. HDMI).

Browsing available models, thin and light is a common theme, making them pack and go anywhere.

Chromebook (and ChromeOS) is commonly positioned as an internet-reliant thin-client of sorts: It’s easy to summarize the intent of a Chromebook as a Chrome Browser as a computer system, with “applications” in the form of Chrome Apps and Extensions.  –and for email, general browsing, office productivity (via Google Docs), VOIP (Hangouts), and light photo editing, its quite a sufficient setup.

However, by following some well documented steps, a Chromebook can be easily enabled as a stealth economy Ultrabook alternative:

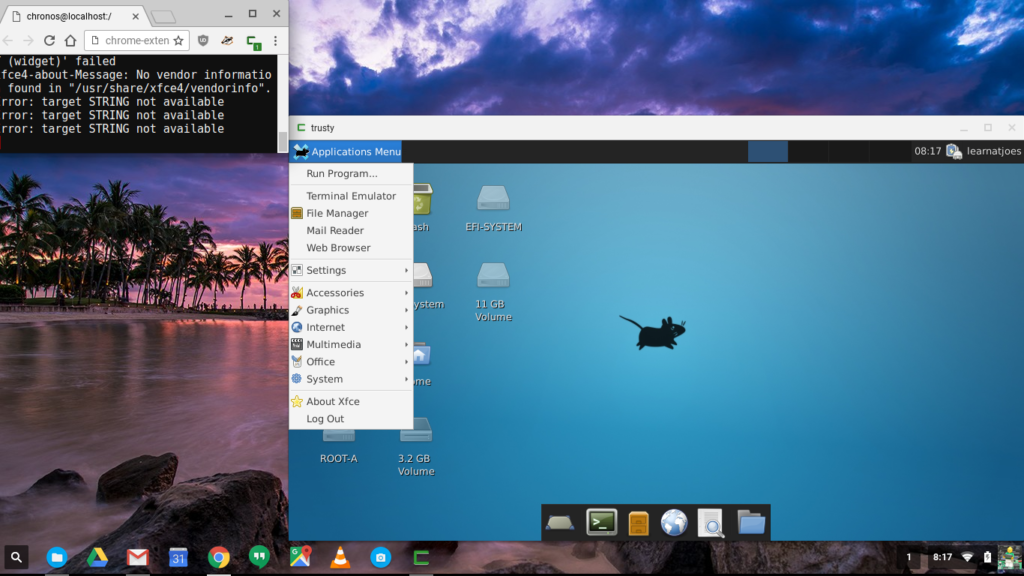
Screenshot 2016-07-18 at 8.17.56 AM

Yes, I am a recently new owner of a Chromebook that runs an Ubuntu Linux system within a window.  Running Linux opens access to all software (within CPU and storage reasons) on the Linux platform to my $200 econo-laptop that seems to have no problem returning 11 hours unplugged life under more pedestrian uses.

I further detail what I did to get the screen capture above in this HowTo, but in summary it was:

  1. Unbox and verify machine works out of the box.  Allow system to update.
  2. Backup The System, just in case…
  3. Enable Developer Mode
  4. Use Crouton to automagically download and install Linux in a chroot.

Tip: Using a large SD card split between “local storage” and “Linux” helps keep the limited eMMC block dedicated for ChromeOS.

New-purchase prices for Chromebooks tend to range between just below $100 to maybe $400 on the higher end, with the Pixel on the other side of $1k.  In the 2-3 US Benjamins section, distinguishing specs are screen size, CPU type, and RAM.  Look for:

  • Screen size: 11.6″ is great for ultra portability, 14″ or 15″ can be had with 1080p resolution.
  • Small convertible models are nice if you want to stay on from gate to gate while flying domestically in the US.
  • I’d strongly recommend an Intel based CPU (e.g. Celeron).  ARM is fine for ChromeOS, but may present some hurdles with Linux applications since most are written for x86.
  • Strong preference for fanless design.  One less thing to fail or draw milliwatts from the battery, and less concern for internal dust accumulation.
  • More RAM is better if available.  For most models, its not user up-gradable so you’ll have to choose when you buy.
  • Larger eMMC is nice-to-have, but ChromeOS itself keeps a small footprint on its own.  Make sure your model is equipped with a SD or microSD card slot.

The system I’m staging as a sample software development platform (and using to update this page…) was obtained for $200.  It comes with a matte, anti-glare 11.6″ screen, 4GB RAM, 11hrs quoted battery life and has a $40 128GB microSD card loaded.

A value that’s pretty hard to beat for a tad under $250.

Happy Computing!

Further Reading: